Building my own DIY NAS
How to Build a Powerful Home NAS Server on a Budget
Ever since I shared my epic saga of self-hosting Immich on a Raspberry Pi (check out the post if you haven’t already, because, you know, it’s a masterpiece), everything’s been smooth sailing. Until, of course, I started adding more services.
Suddenly, 1TB of SSD plugged into a humble Raspberry Pi just isn’t going to cut it anymore. So, I’ve ventured into the treacherous world of Mini PCs, DAS, and NAS. Here’s what I’ve found so far.
1 The quest for the perfect NAS
1.1 Mini PCs + DAS
I’ve been eyeing Mini PCs like the Intel NUC and the Lenovo ThinkCentre. These things are small, powerful, and can double as a server. Sounds perfect, right? Well, almost. The problem is, they’re about as customizable as a toaster, and you’d need to add a Direct Attached Storage (DAS) to expand your storage. That’s another device, more cables, and—let’s be real—more money. And do I really want two devices doing the job of one? Especially when we start thinking about the power consumption? Yeah, no thanks.
- Small and powerful (enough to do the job)
- Can double as a server
- Not customizable
- Need to add a DAS if you want to expand storage
1.2 Pre-built NAS
Enter the world of pre-built NAS solutions, where everything is already done for you by the pros at Synology and QNAP. Just hand over your hard-earned cash, plug in a few drives, and voilà ,you’ve got yourself a functional NAS! It sounds ideal, doesn’t it. After all, who wouldn’t appreciate a hassle-free setup? Except for the part where you’re paying way more than you should for the privilege of having your hands tied.
But, hey, why bother with that whole “making it your own” experience? Why waste time configuring anything when you can just buy it ready-made ?
- User-friendly
- Plug-and-play
- Expensive
- Not upgradeable
1.3 DIY NAS
Where you can actually build your own server, tailor it to your exact whims, and maybe even break a sweat in the process. Sure, it’s more work, but if you enjoy earning your tech, then this is your golden ticket. It’s like the difference between buying a fancy meal at a restaurant and preparing it yourself , except the kitchen is your mind, and the meal is, you know, storage and configuration.
- Customizable
- Budget-friendly
- Expandable
- Repairable
- Fun
- Time-consuming
- Requires some technical knowledge
- No warranty
You already know which path I chose. I’m going DIY all the way. Everyone has their own standard and so I also have some requirements for my NAS:
- Aesthetically pleasing: It needs to be easy on the eyes. I mean, I’m going to have to stare at this thing every day, so it might as well be something I can proudly display next to my collection of vintage tech.
- Expandable: This NAS needs to be future-proof. I’m talking room to grow, because who doesn’t love adding more storage like a tech hoarder? I don’t want to hit my storage limits and have to scrap everything in six months.
- Low power consumption: No one want to burn a hole in their wallet with electricity bills.
- Quiet: Seriously. It’s a NAS, not a jet engine. I don’t need to hear this thing roaring away, especially when it’s in my bedroom.
- Repairibility: I am an advocate of the right to repair.
2 The build
Let’s talk about the glorious build. This isn’t just a “grab some parts and slap ‘em together” kind of job. This is an art form. Its a symphony of hardware and software, a dance of cables and screws. And I’m the conductor…
Eh hem. Let’s get started.
2.1 Parts list
| Part | Component | Price | Link |
|---|---|---|---|
| Jonsbo N2 | Case | $139 | https://www.amazon.com/N2-Aluminum-Support-Integrated-Removable%EF%BC%8CWhite/dp/B0BQJ6HHXJ |
| Panshi B250 ITX | Motherboard | $60 | http://e.tb.cn/h.TZ4S69biV2pK48t?tk=VsLV3q62lEH |
| Intel i5 6500 | CPU | $28 | https://www.ebay.com/itm/226176982867 |
| 750W IceBlade SFX PSU | PSU | $30 | http://e.tb.cn/h.Tasm8yGSnJchjx3?tk=CUl23q6dlEF |
| Kingston Fury Beast 8GB DDR48GB 3200MHz x2 | RAM | $16 | https://www.amazon.com/Kingston-Desktop-Memory-Single-KF432C16BB/dp/B097K5J1SB |
| Jonsbo HP400S | CPU Cooler | $16 | https://www.taobao.com/list/item/41760438474.htm |
| Artic P12 PWM PST | 25mm Case Fan | $10 | https://www.arctic.de/en/P12-PWM-PST/ACFAN00170A |
| WD Red Plus 4T | HDD | $70 | Local seller |
| 128Gb Orico SSD NVME | SSD | $12 | https://oricotechs.com/products/orico-d10-m-2-pcie-3-0-nvme-ssd |
| Total | $381 |
2.2 CPU and motherboard
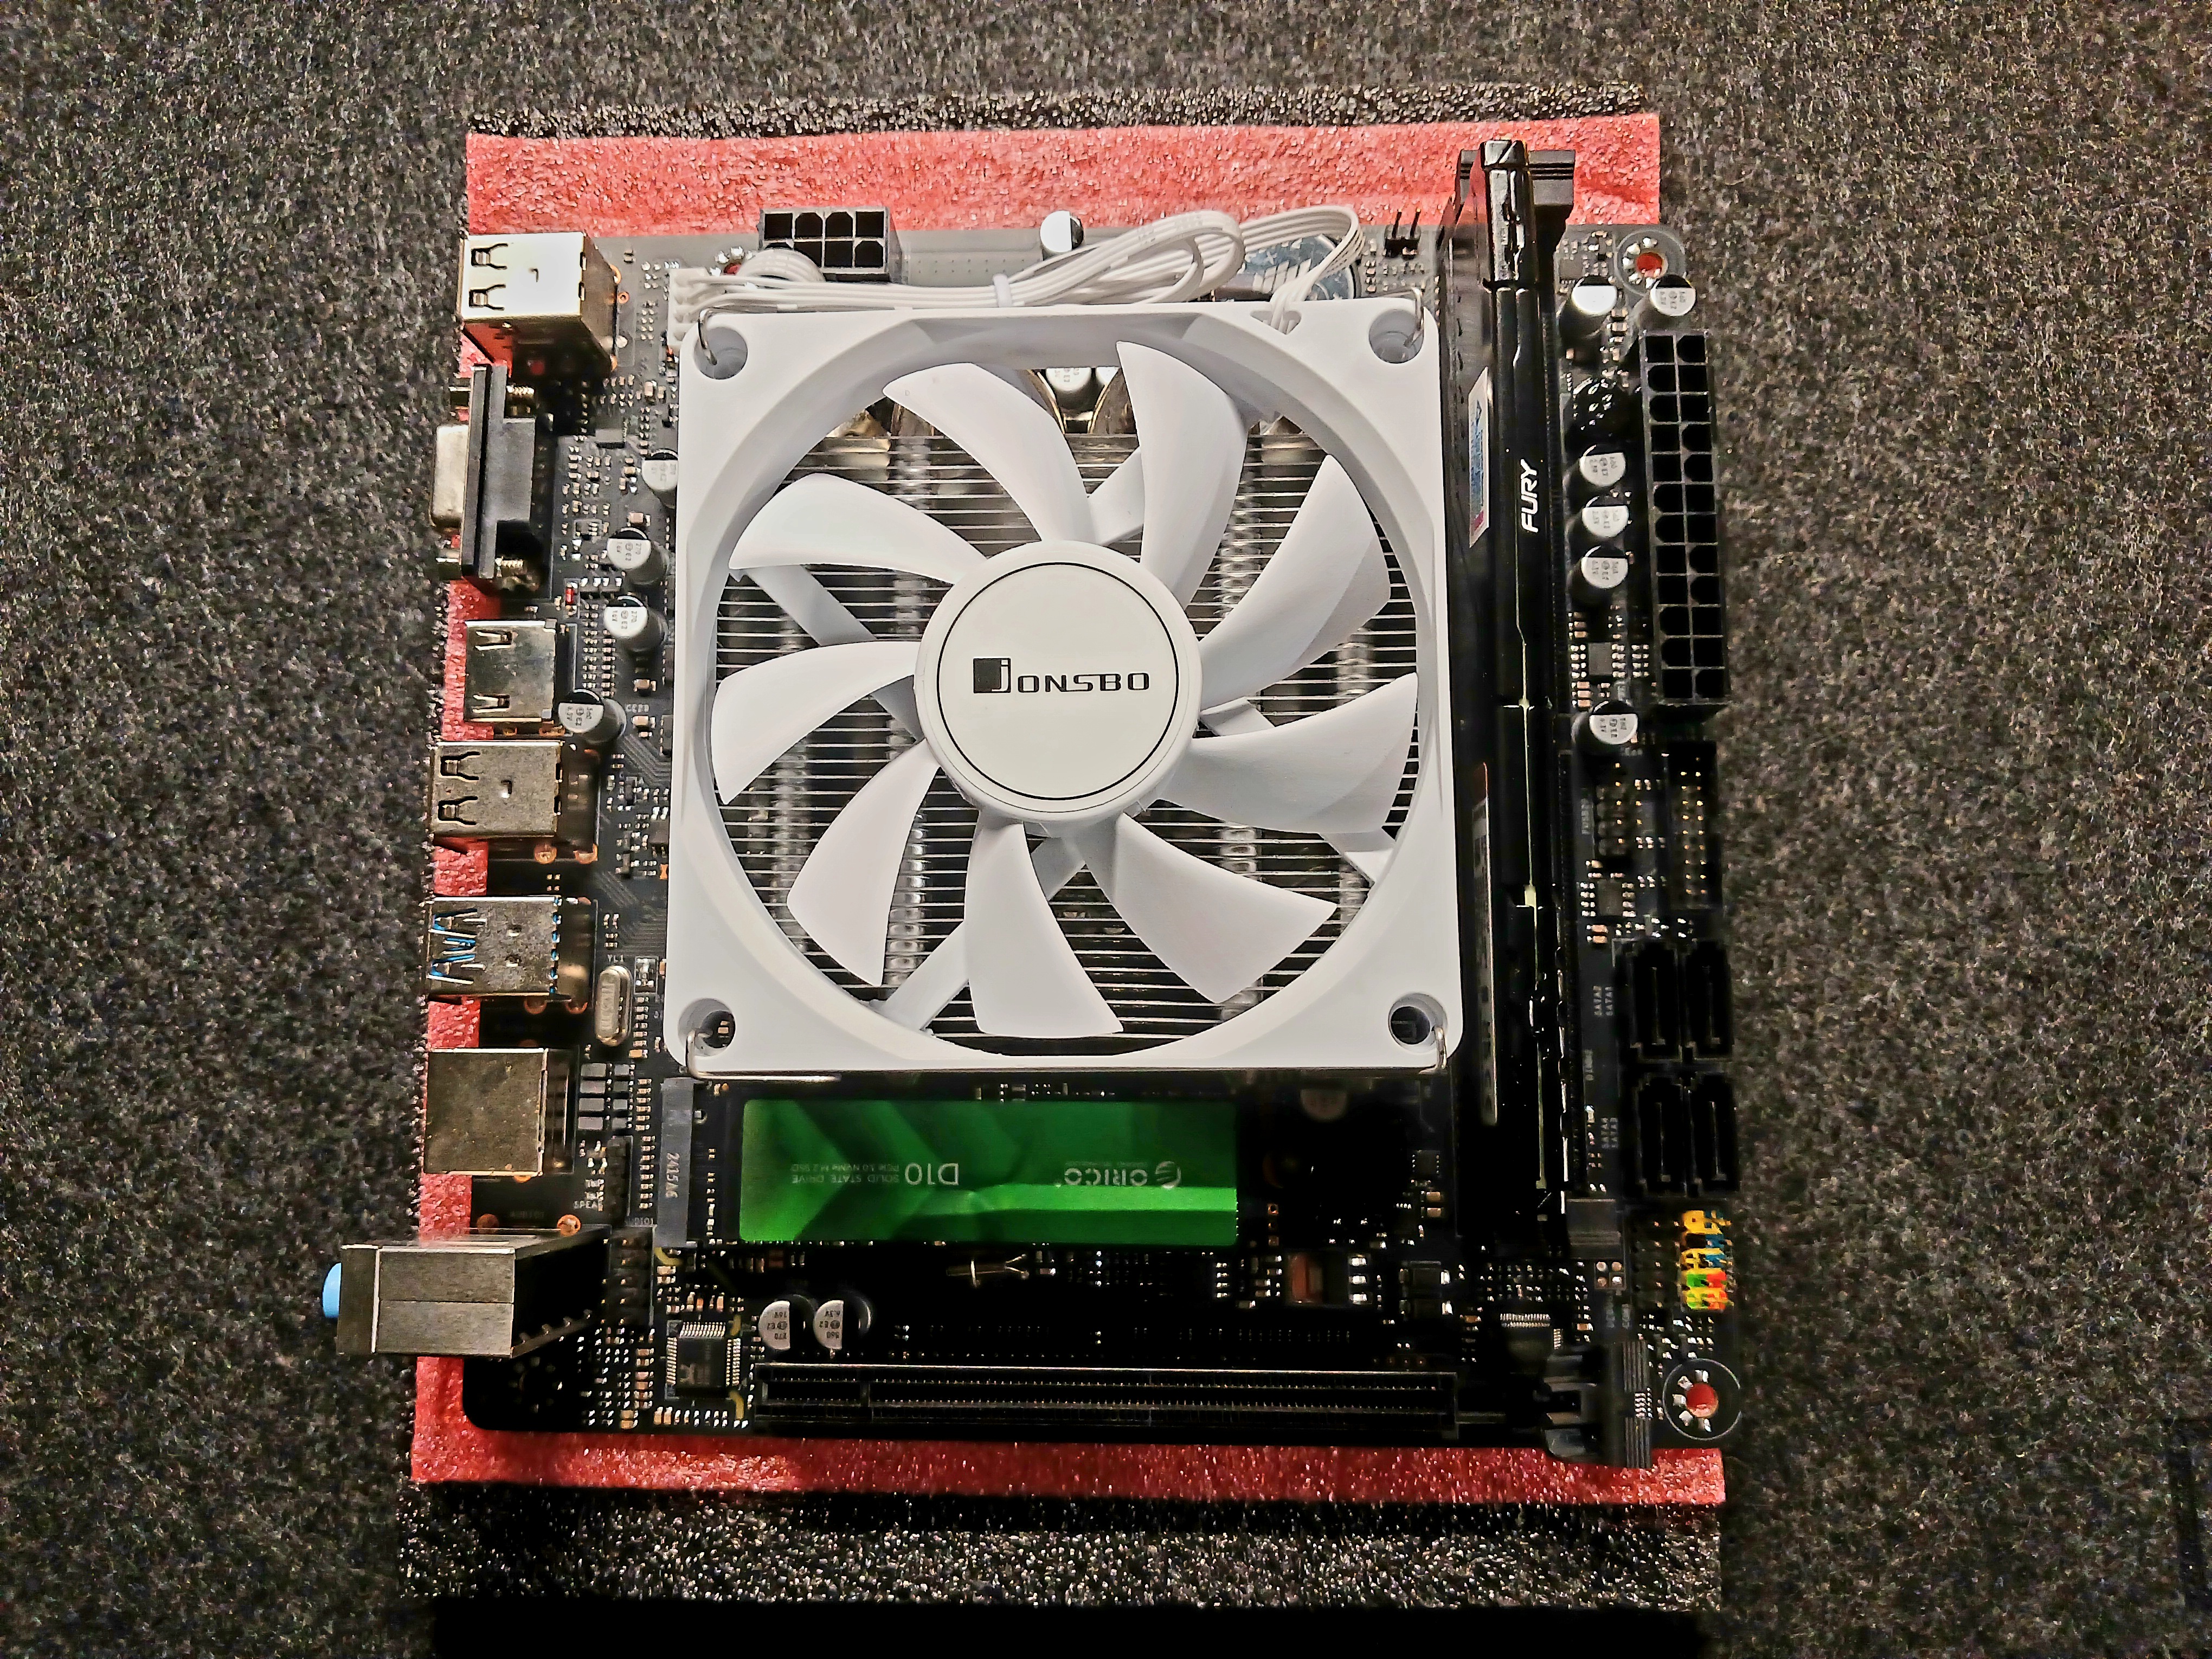
There are not many options for mITX motherboards, especially if you want one with an LGA1151 socket. But I manage to get my hands on a chinese motherboard, the Panshi B250 ITX. It has 4 SATA ports, 2 RAM slots, and a M.2 slot. The CPU is an Intel i5 6500, which is more than enough for a NAS server.
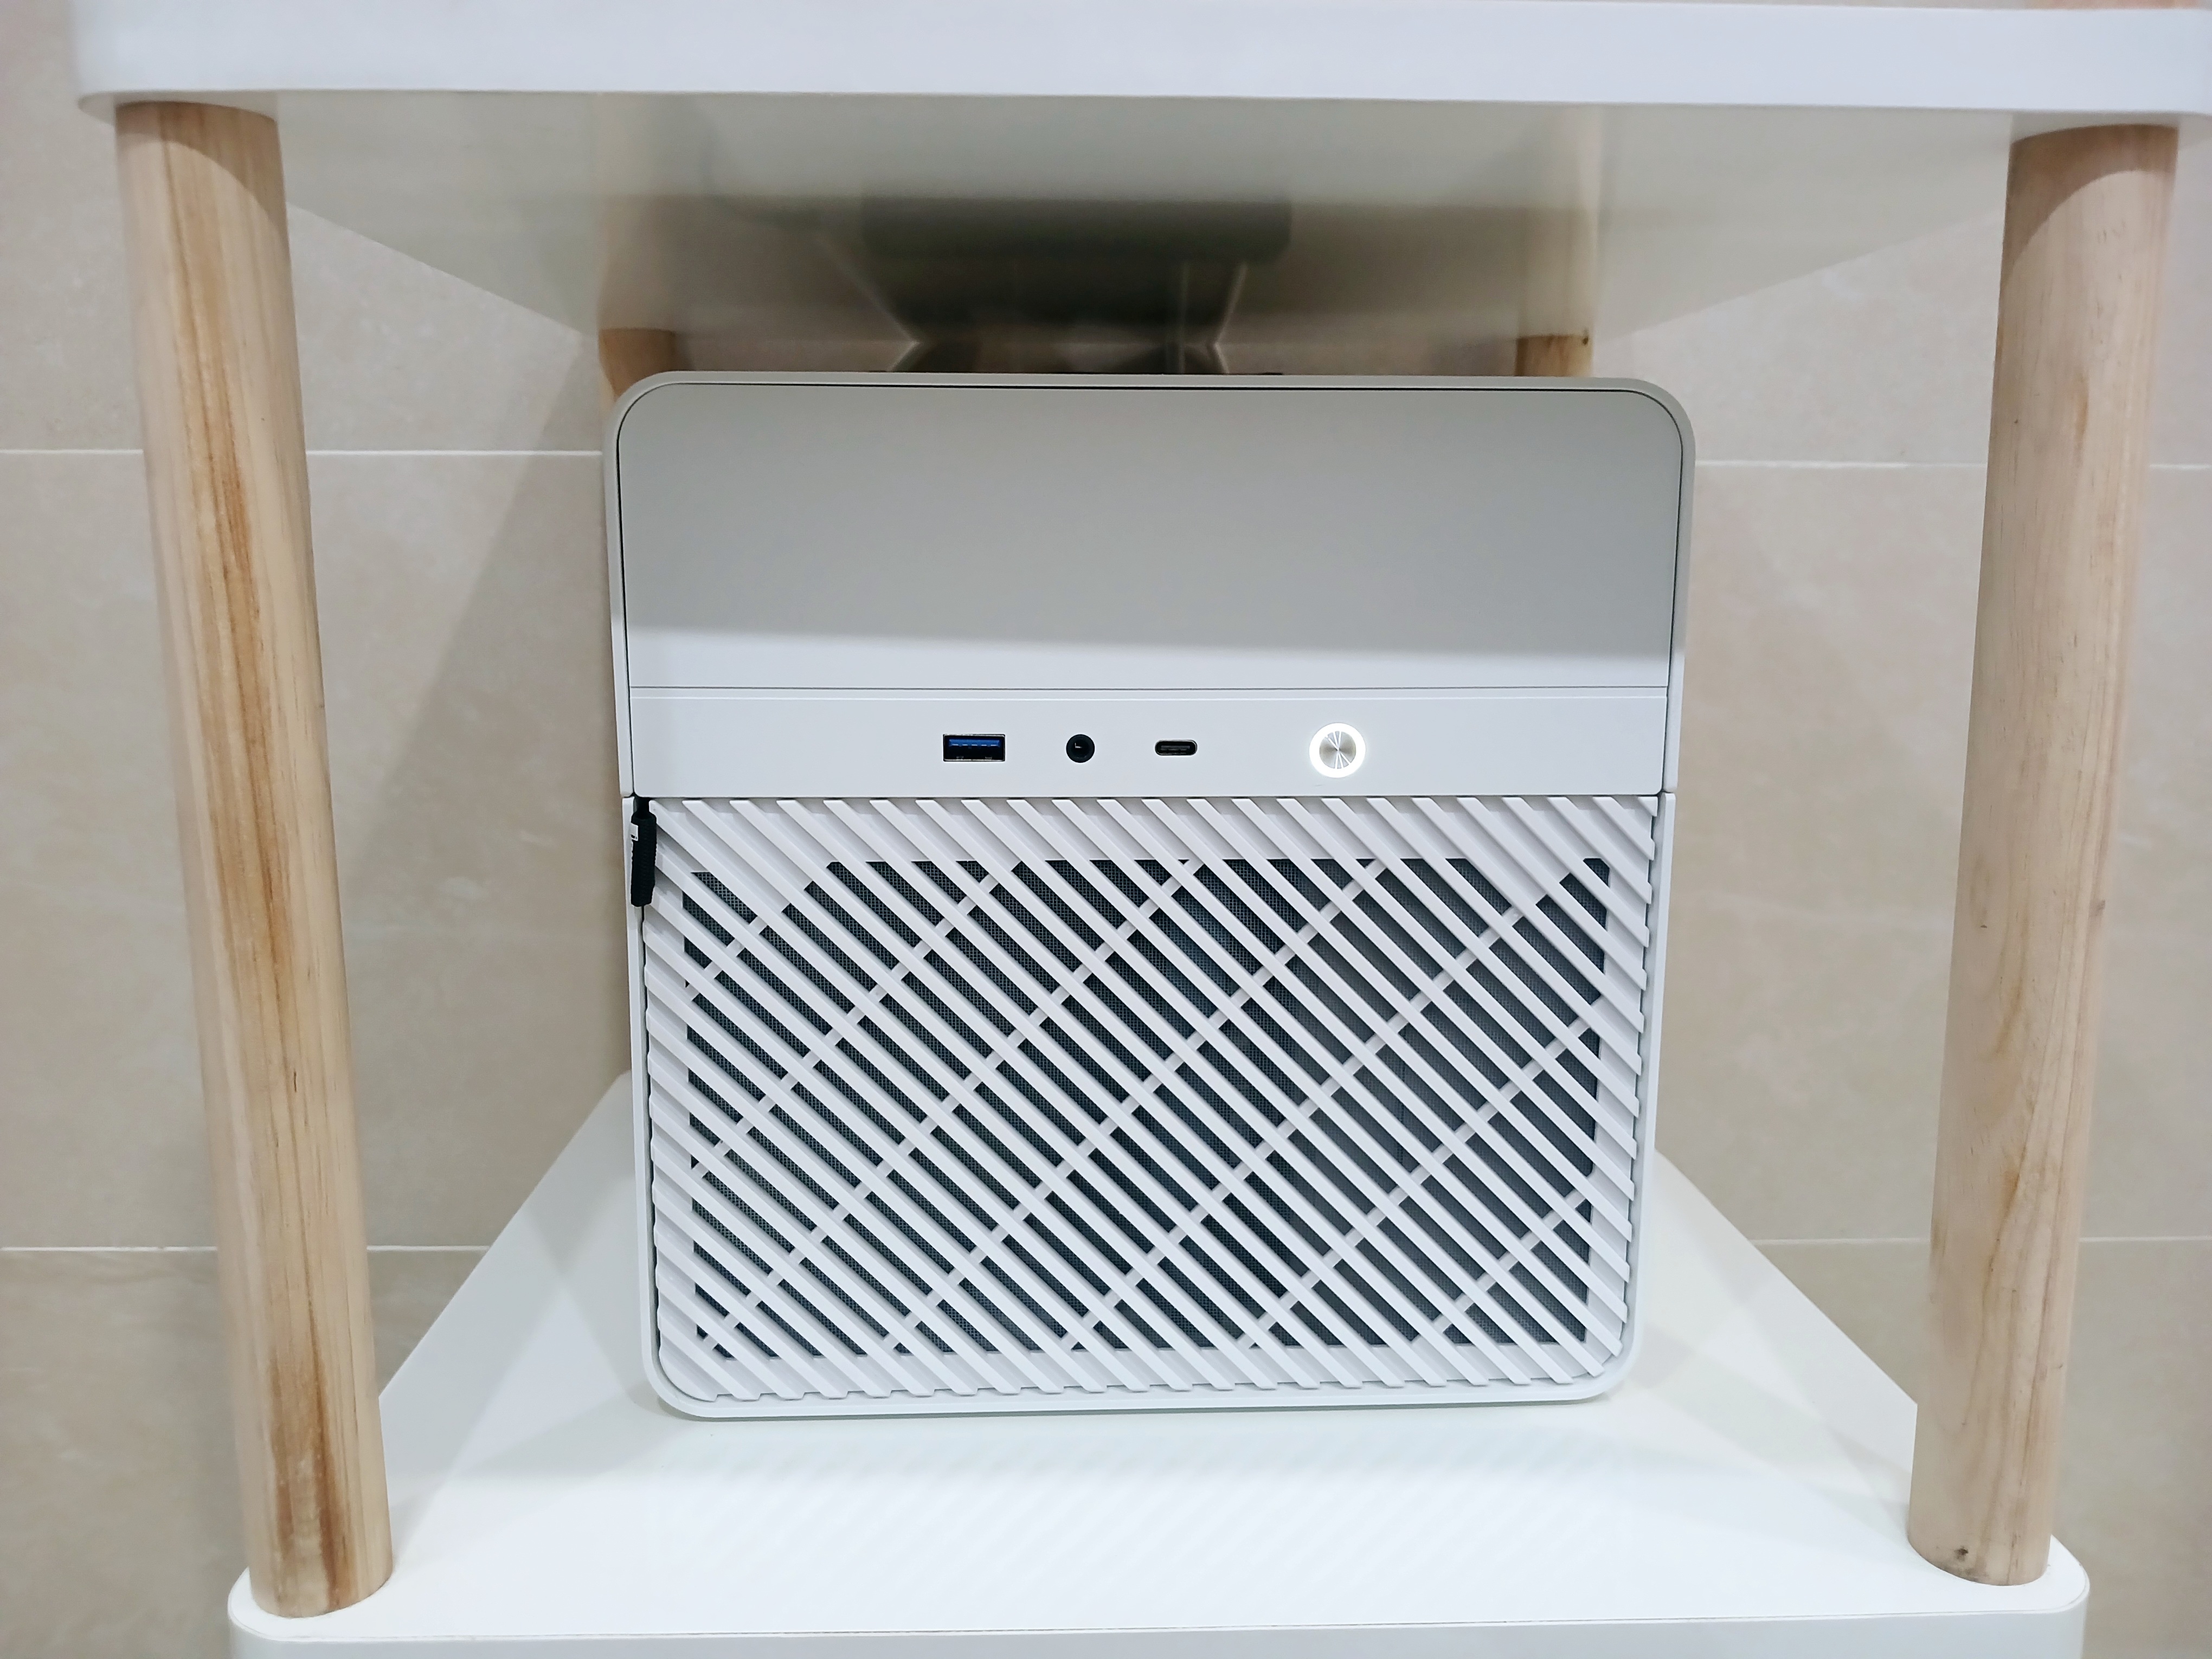
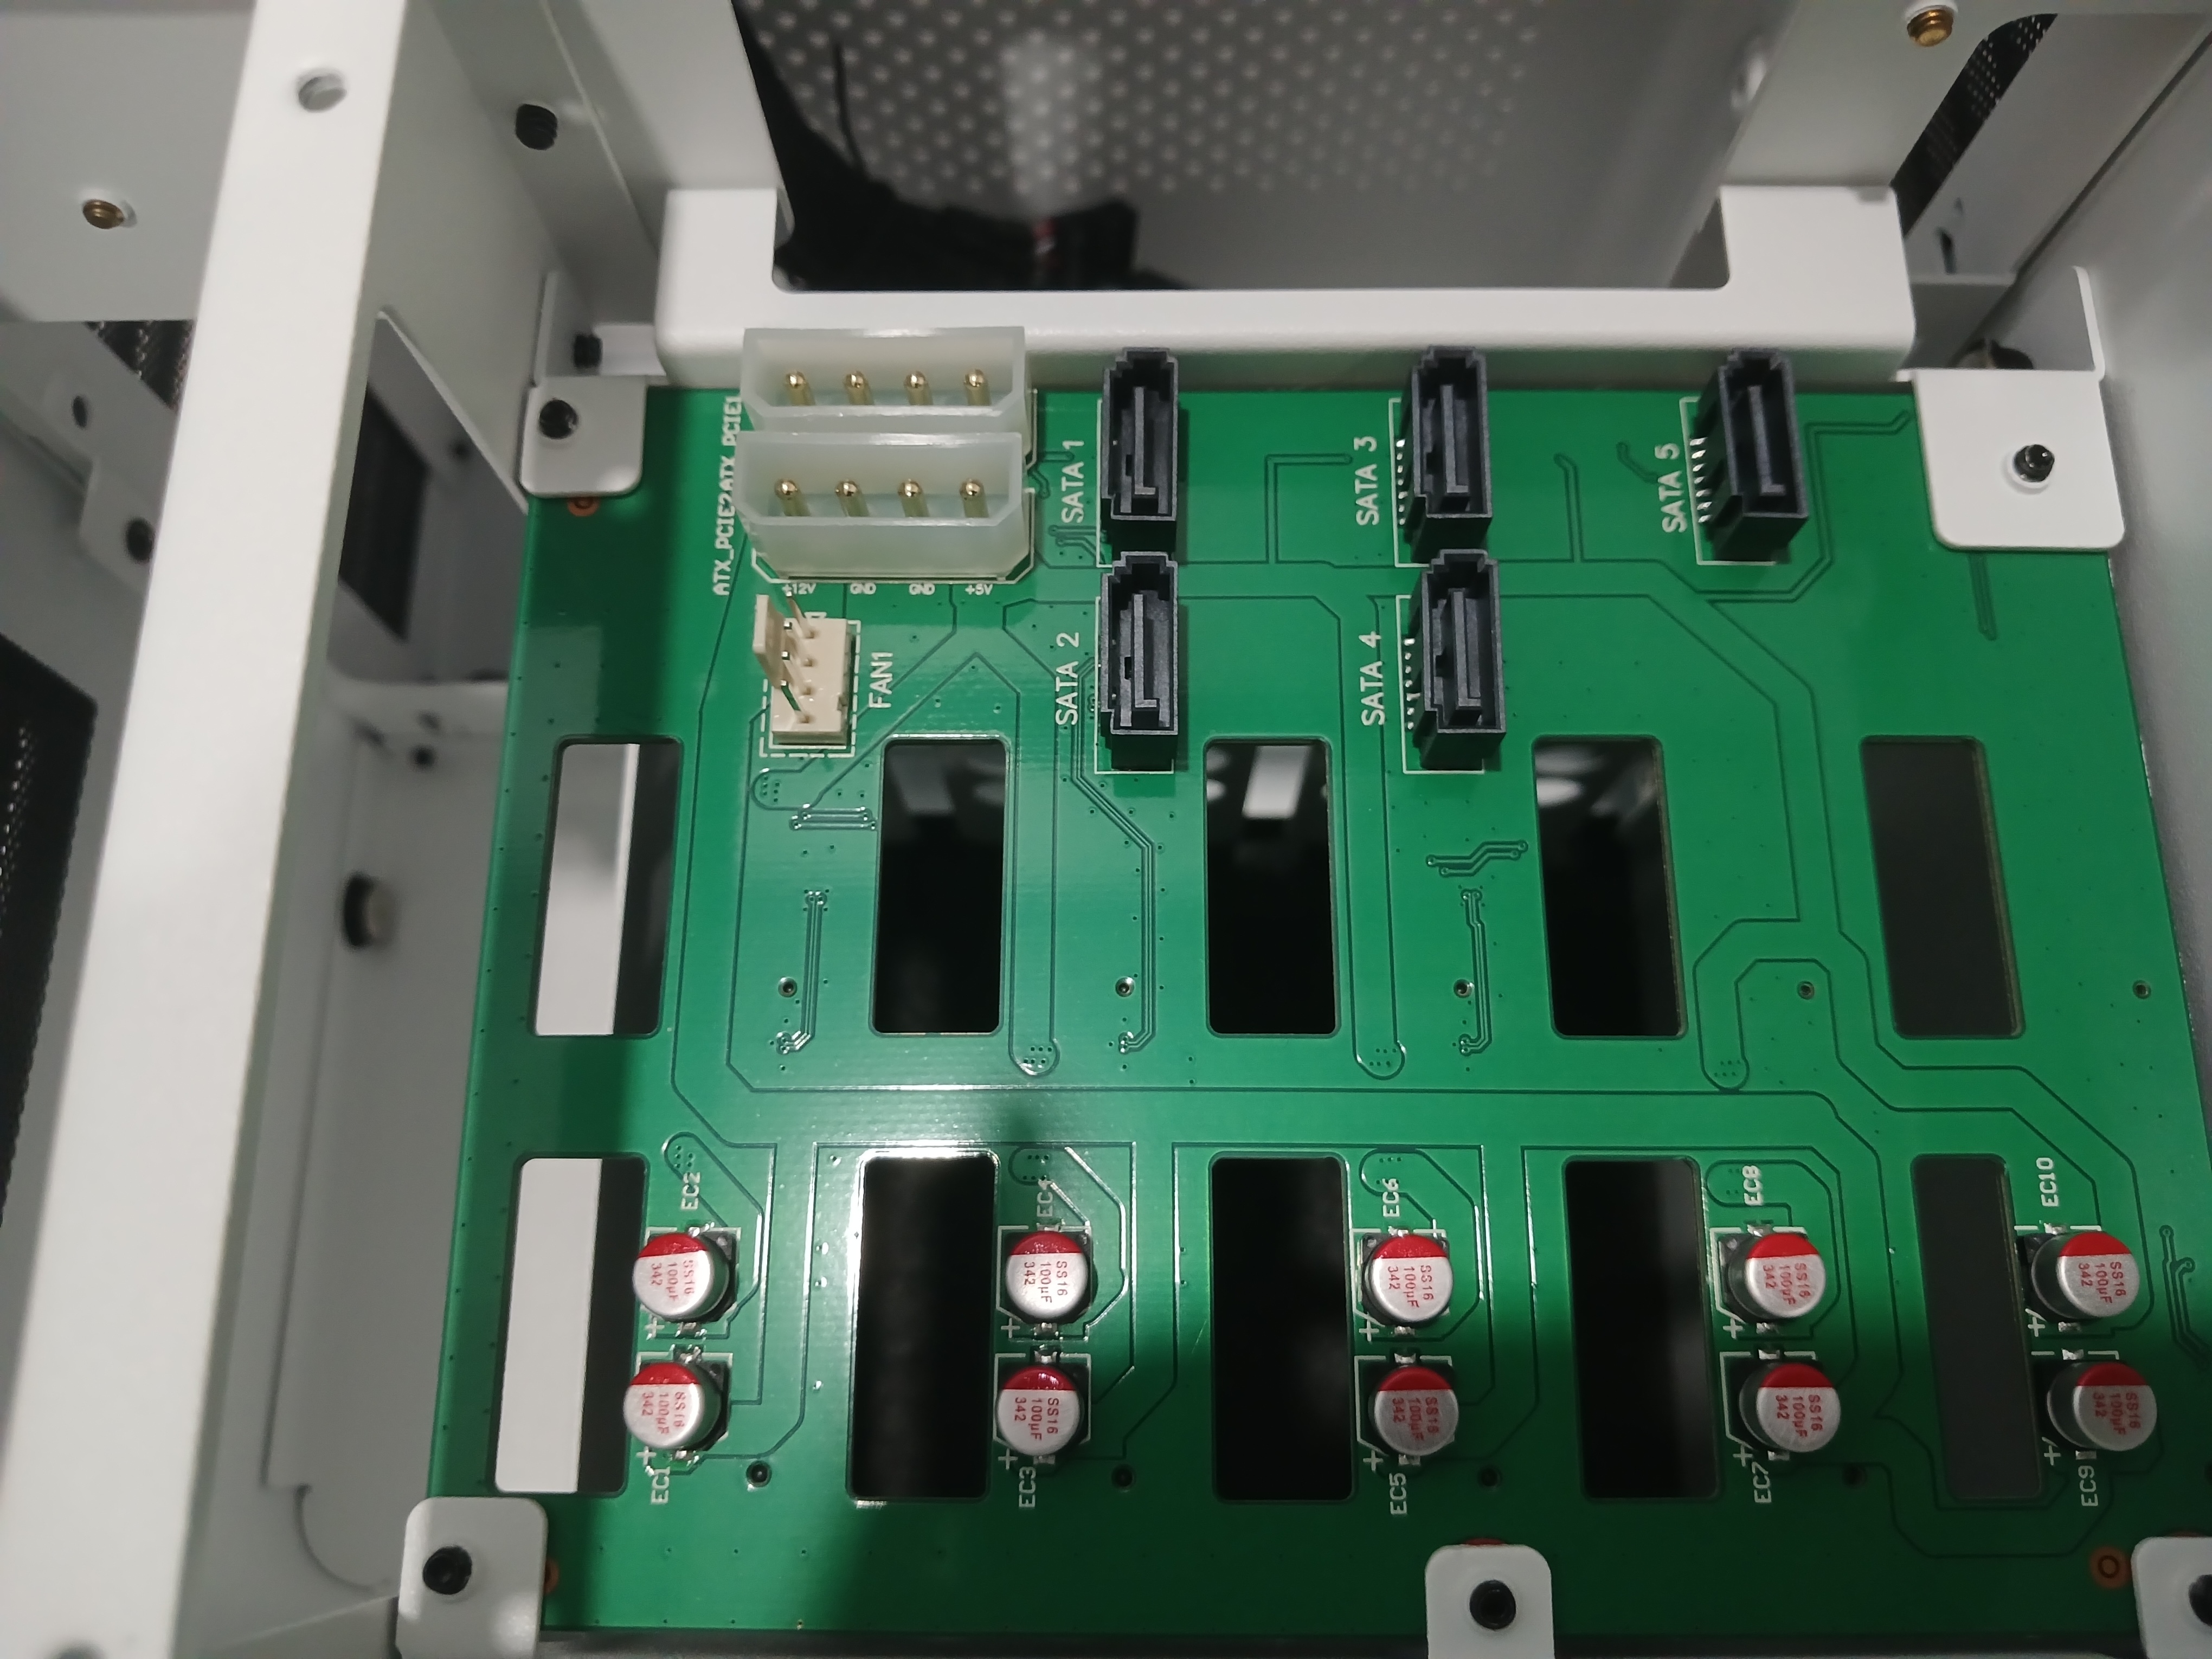
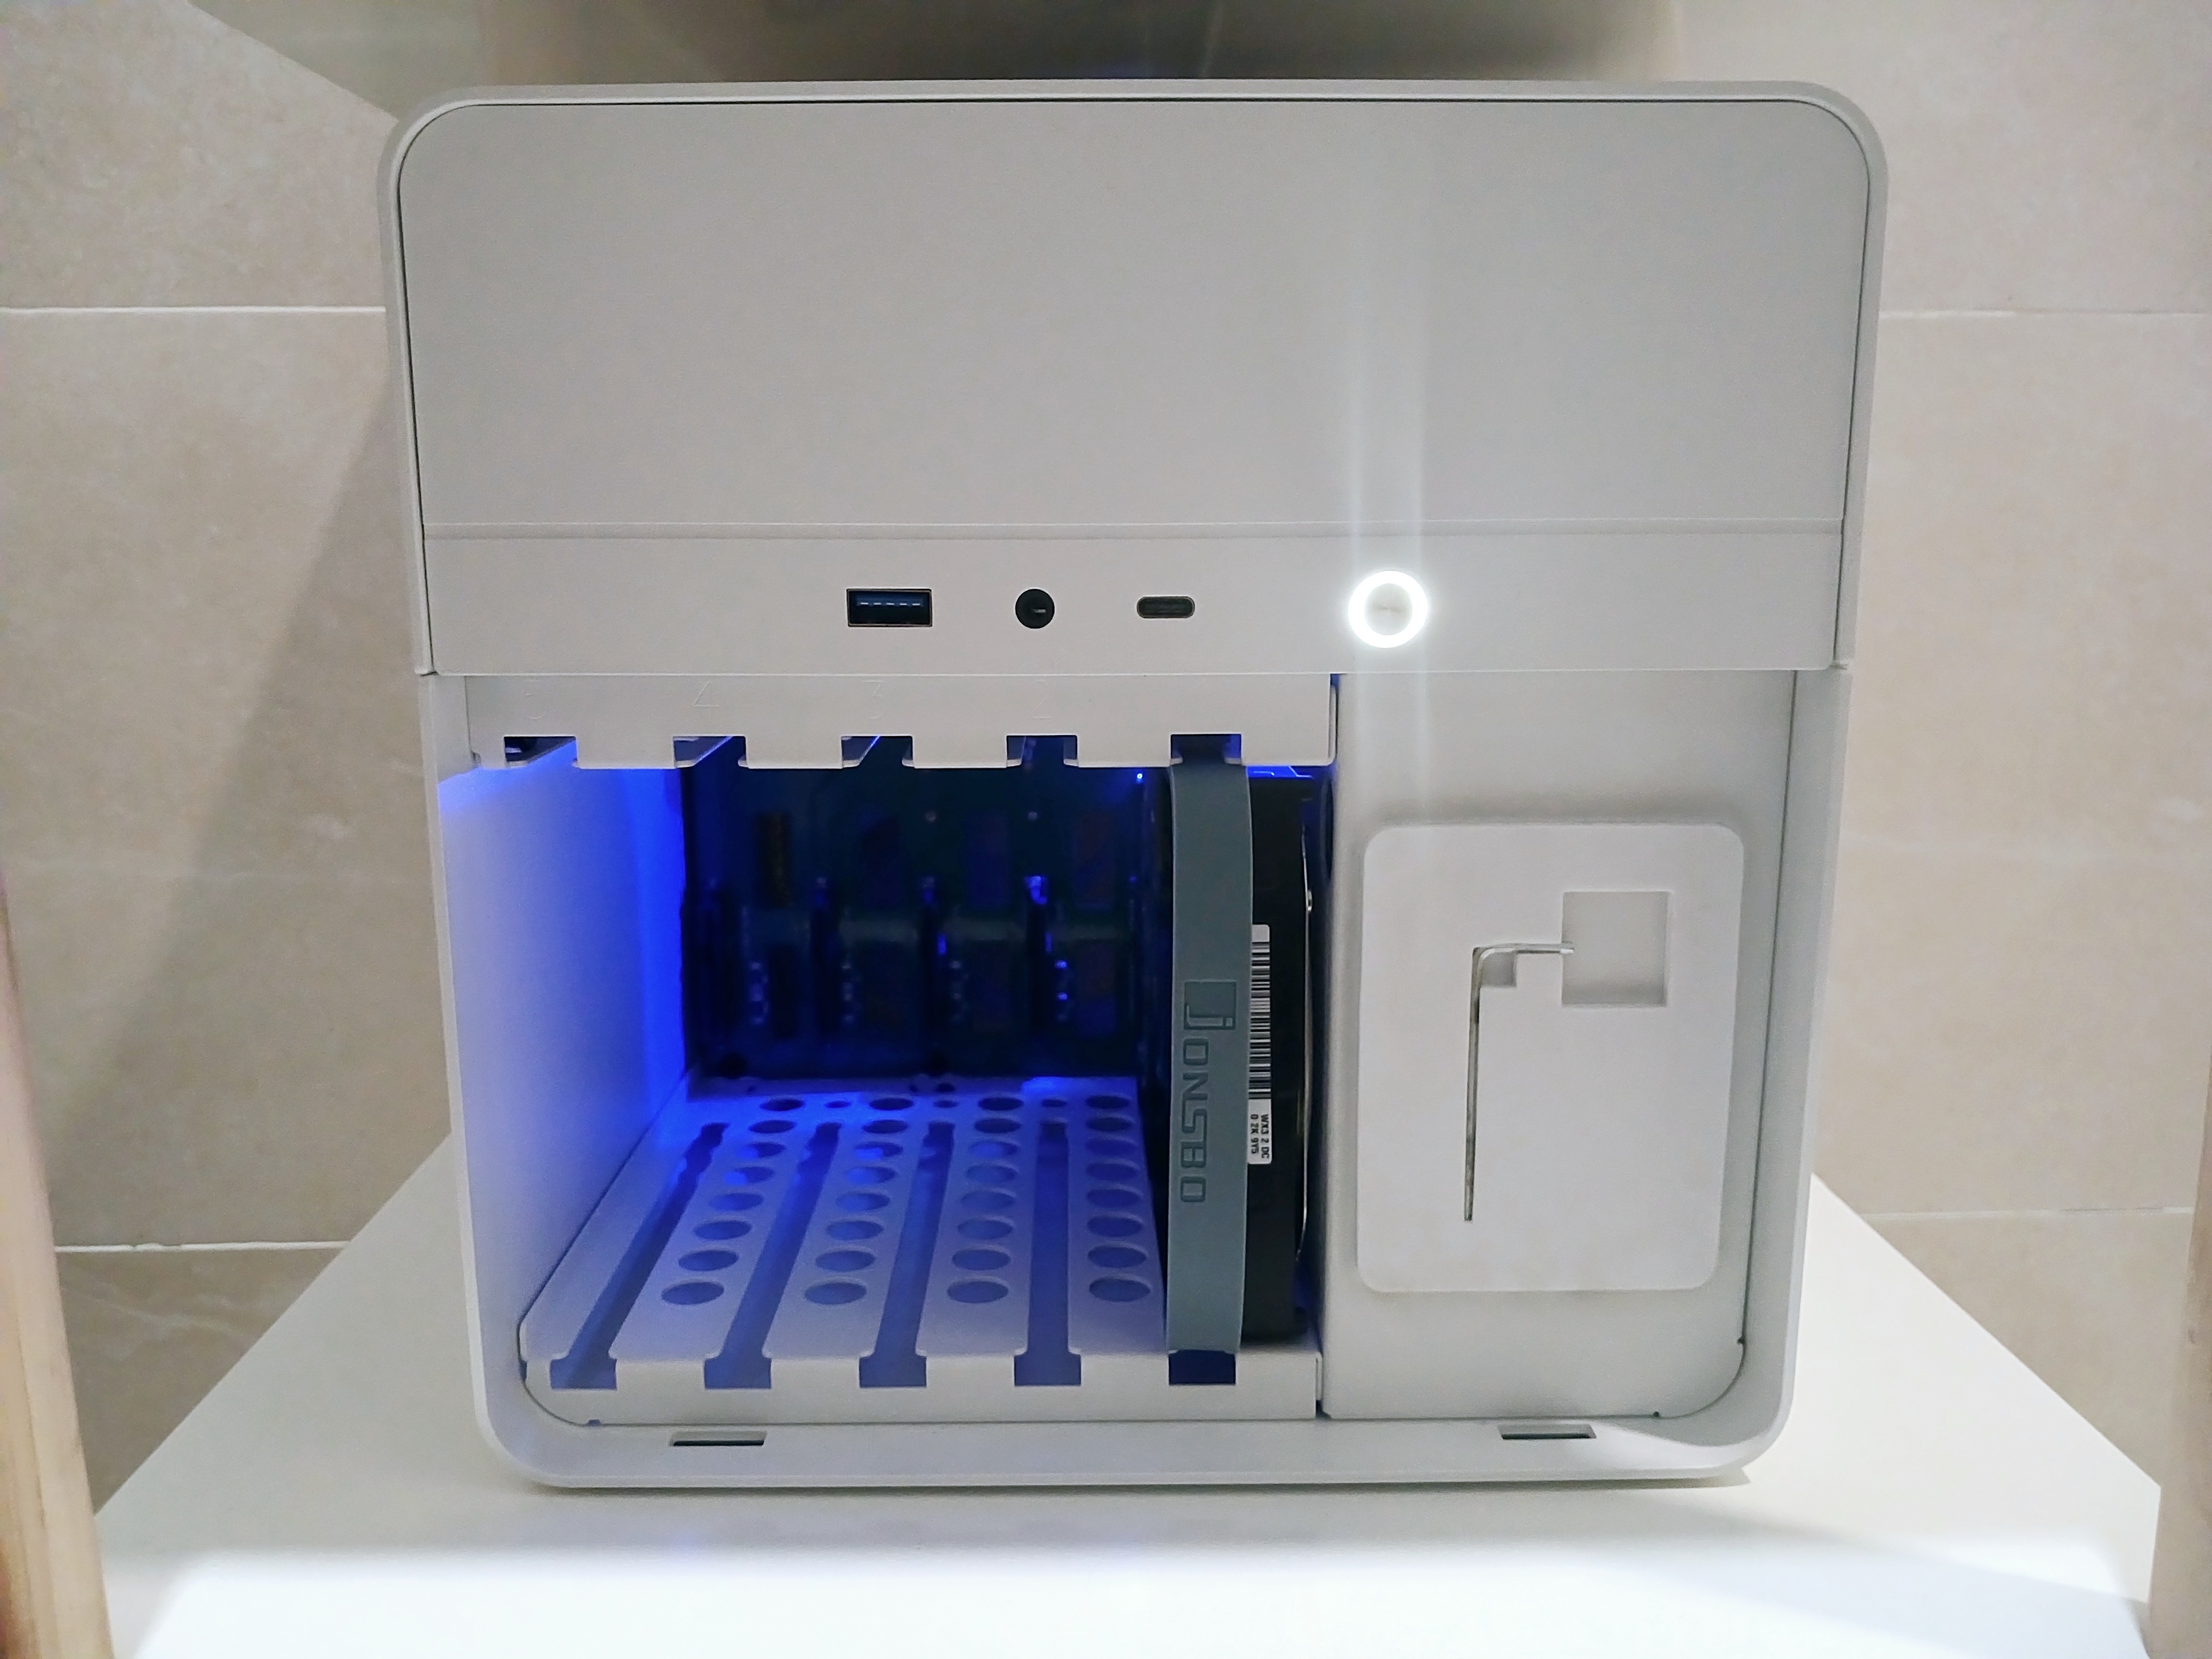
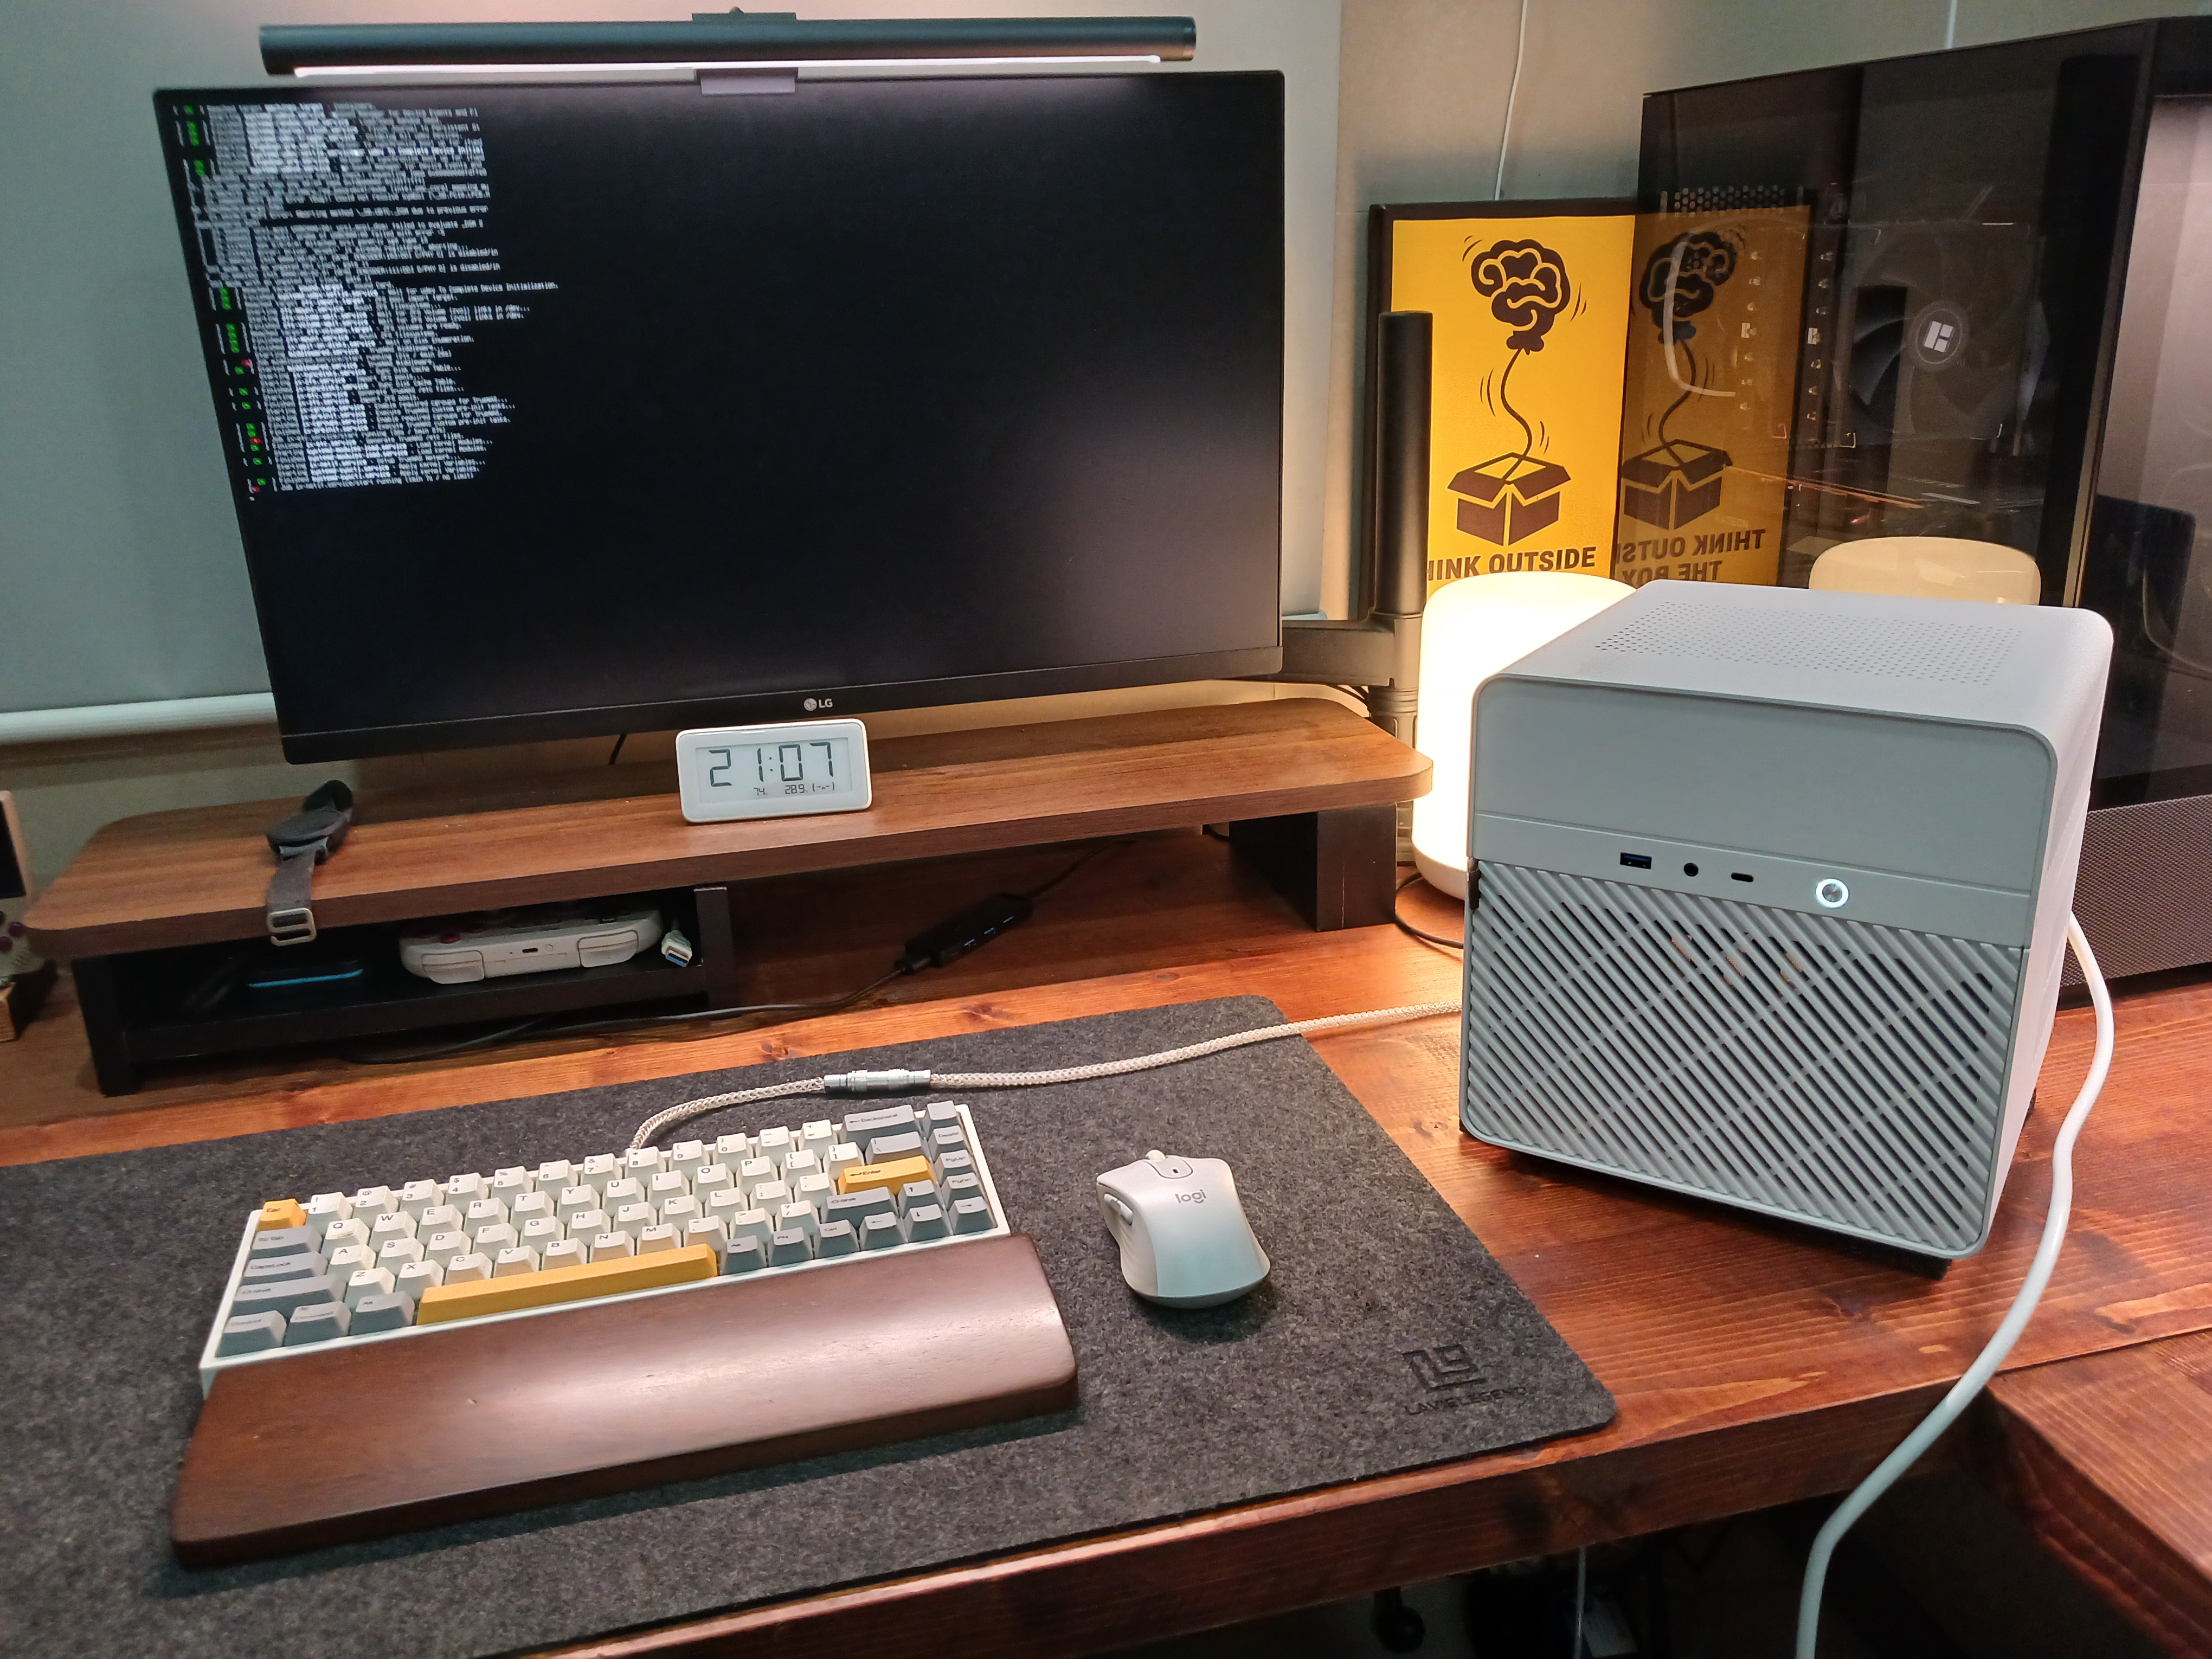
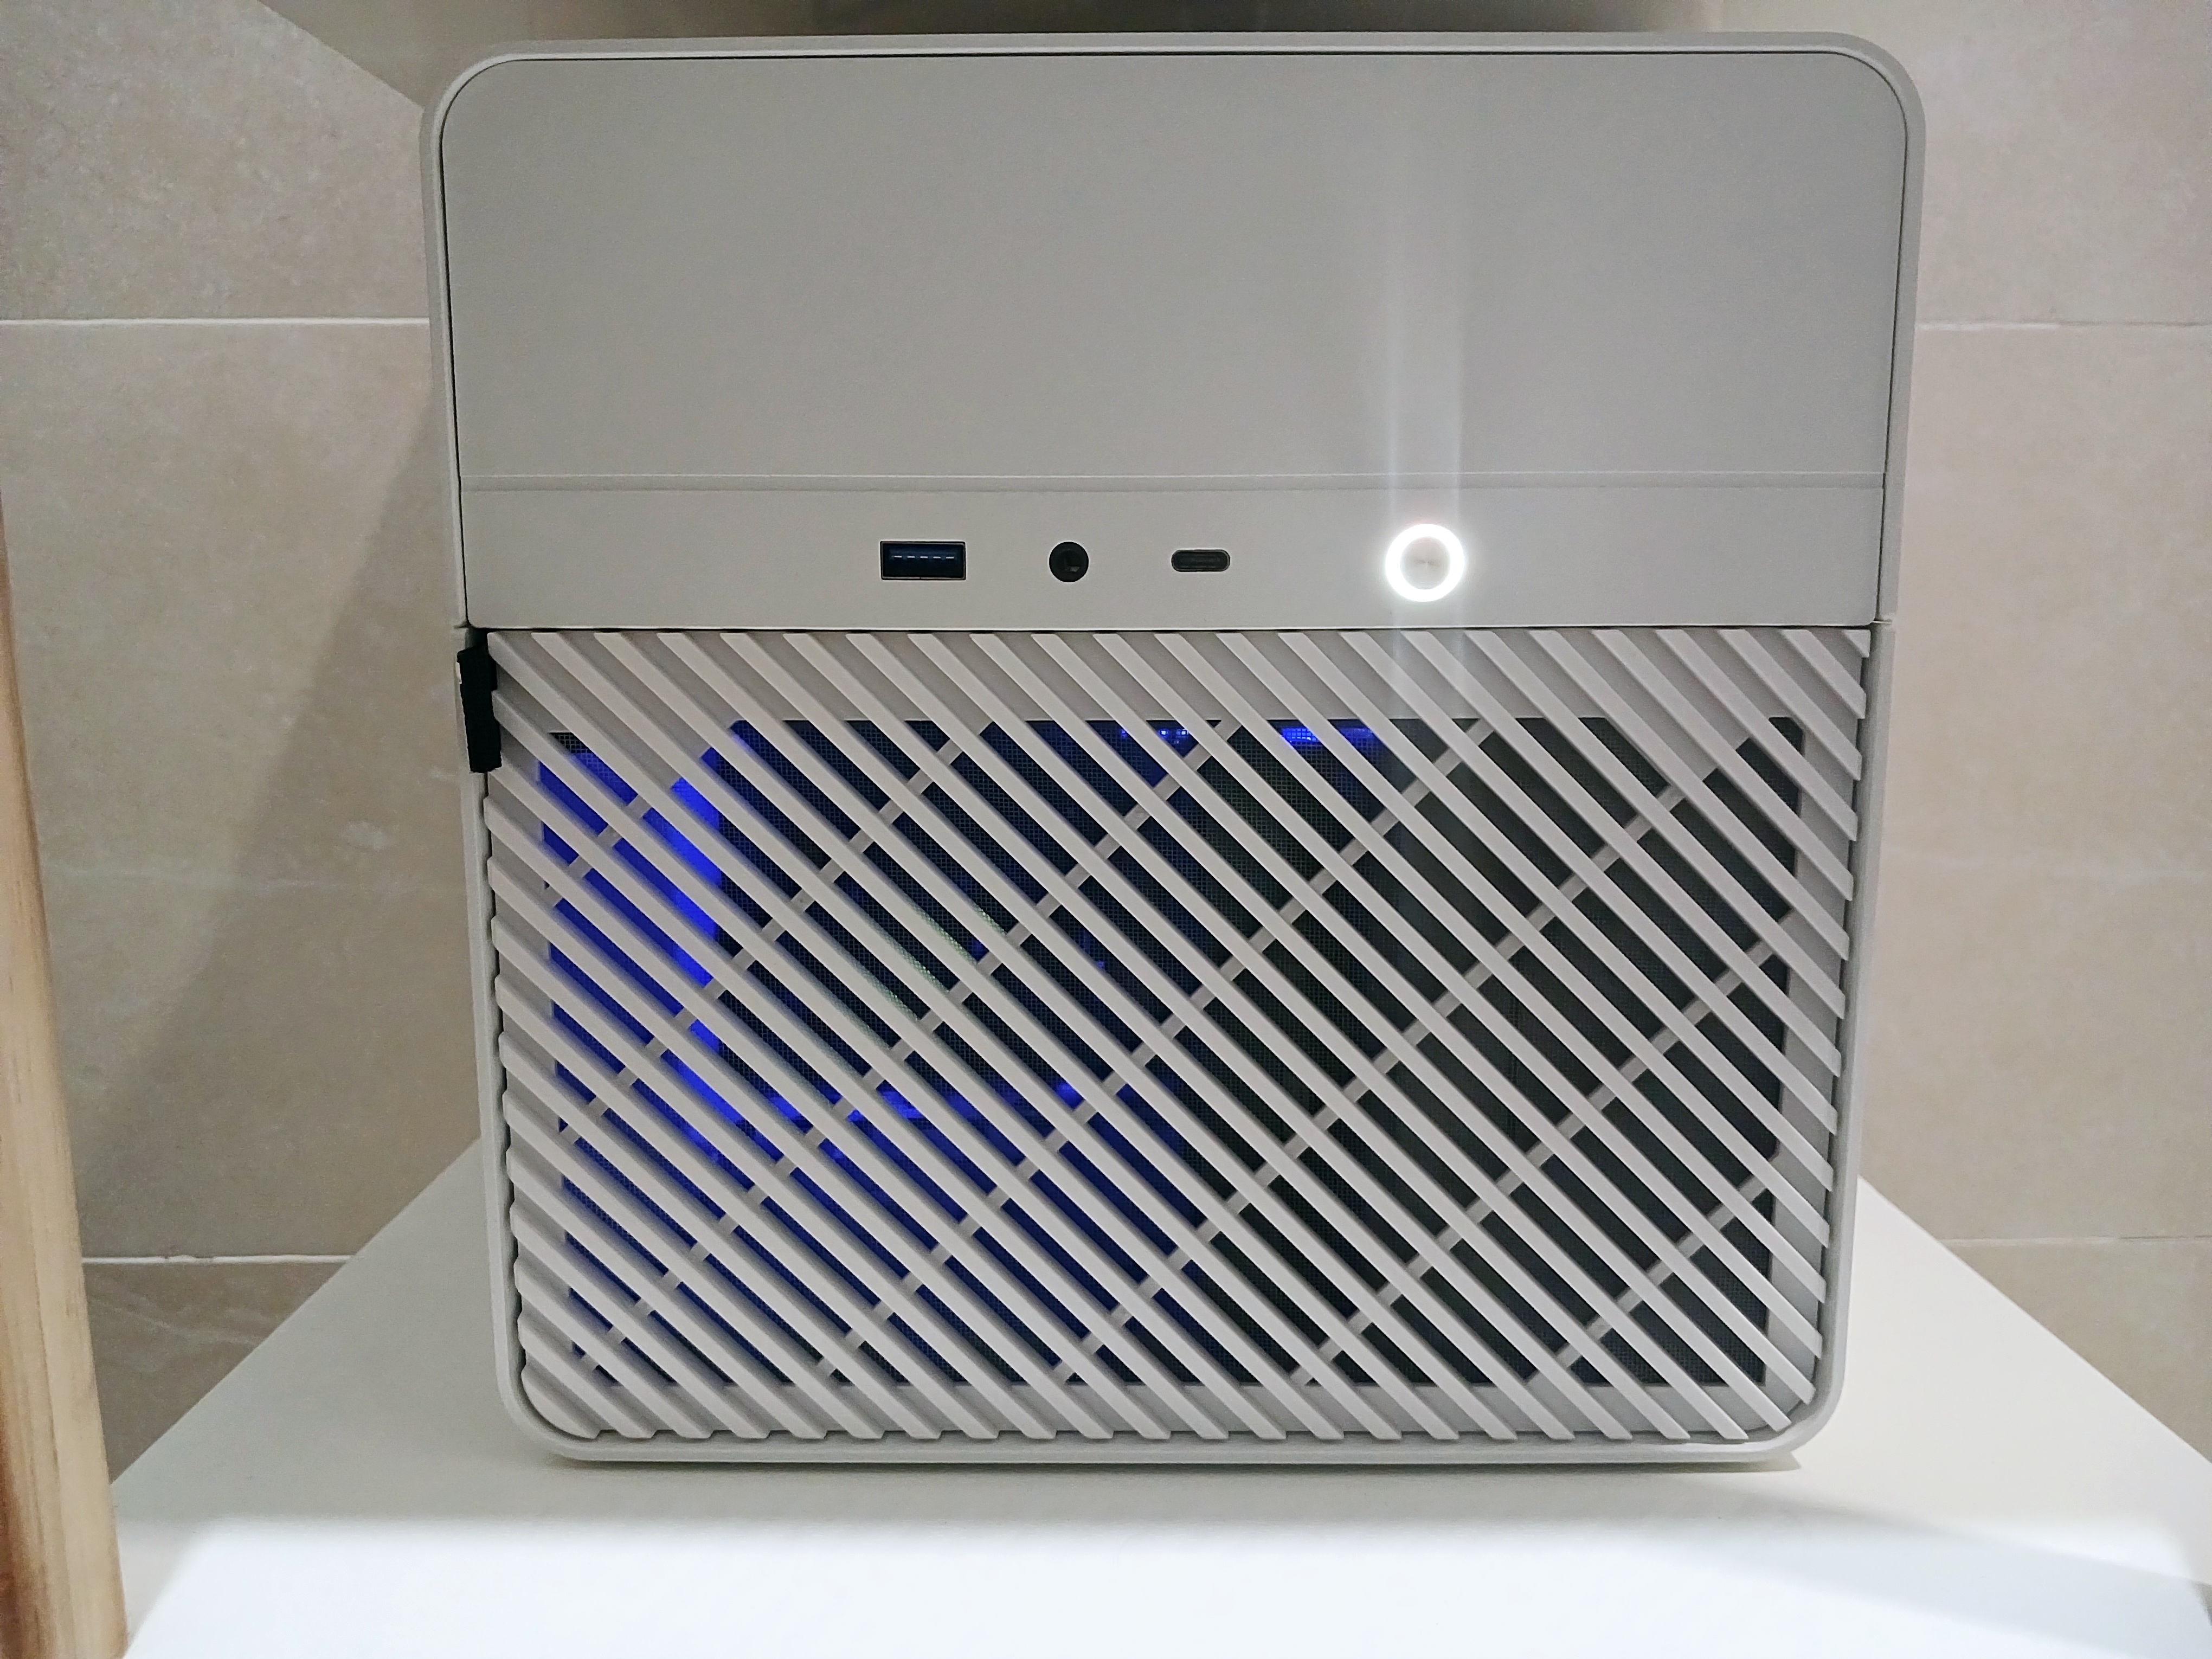
2.3 Case

Before you ask, yes, I did splurge a bit on the case. But seriously, how could I not? The Jonsbo N2 is a gem of beauty. It’s a sleek, aluminum cube that’s as much a work of art as it is a functional NAS case. It’s got that eye-catching white finish that screams class (or IKEA), and a hotswappable backplane, because I’m not here for the hassle of fiddling with cables every time I swap a drive. It’s compact but roomy enough to house 5 3.5” HDDs and 2 additional 2.5” SSDs.
Thanks to b3x0m for recommending this case to me.
The case comes with a 15mm slim fan, which is a drawback because it lacks the static pressure needed to effectively cool the drives. Fortunately, I was able to replace it with a 25mm Arctic P12 PWM fan by using this Molex adapter and right-angled SATA cables. These modifications provided the necessary clearance to fit the larger fan comfortably, improving airflow and cooling performance.

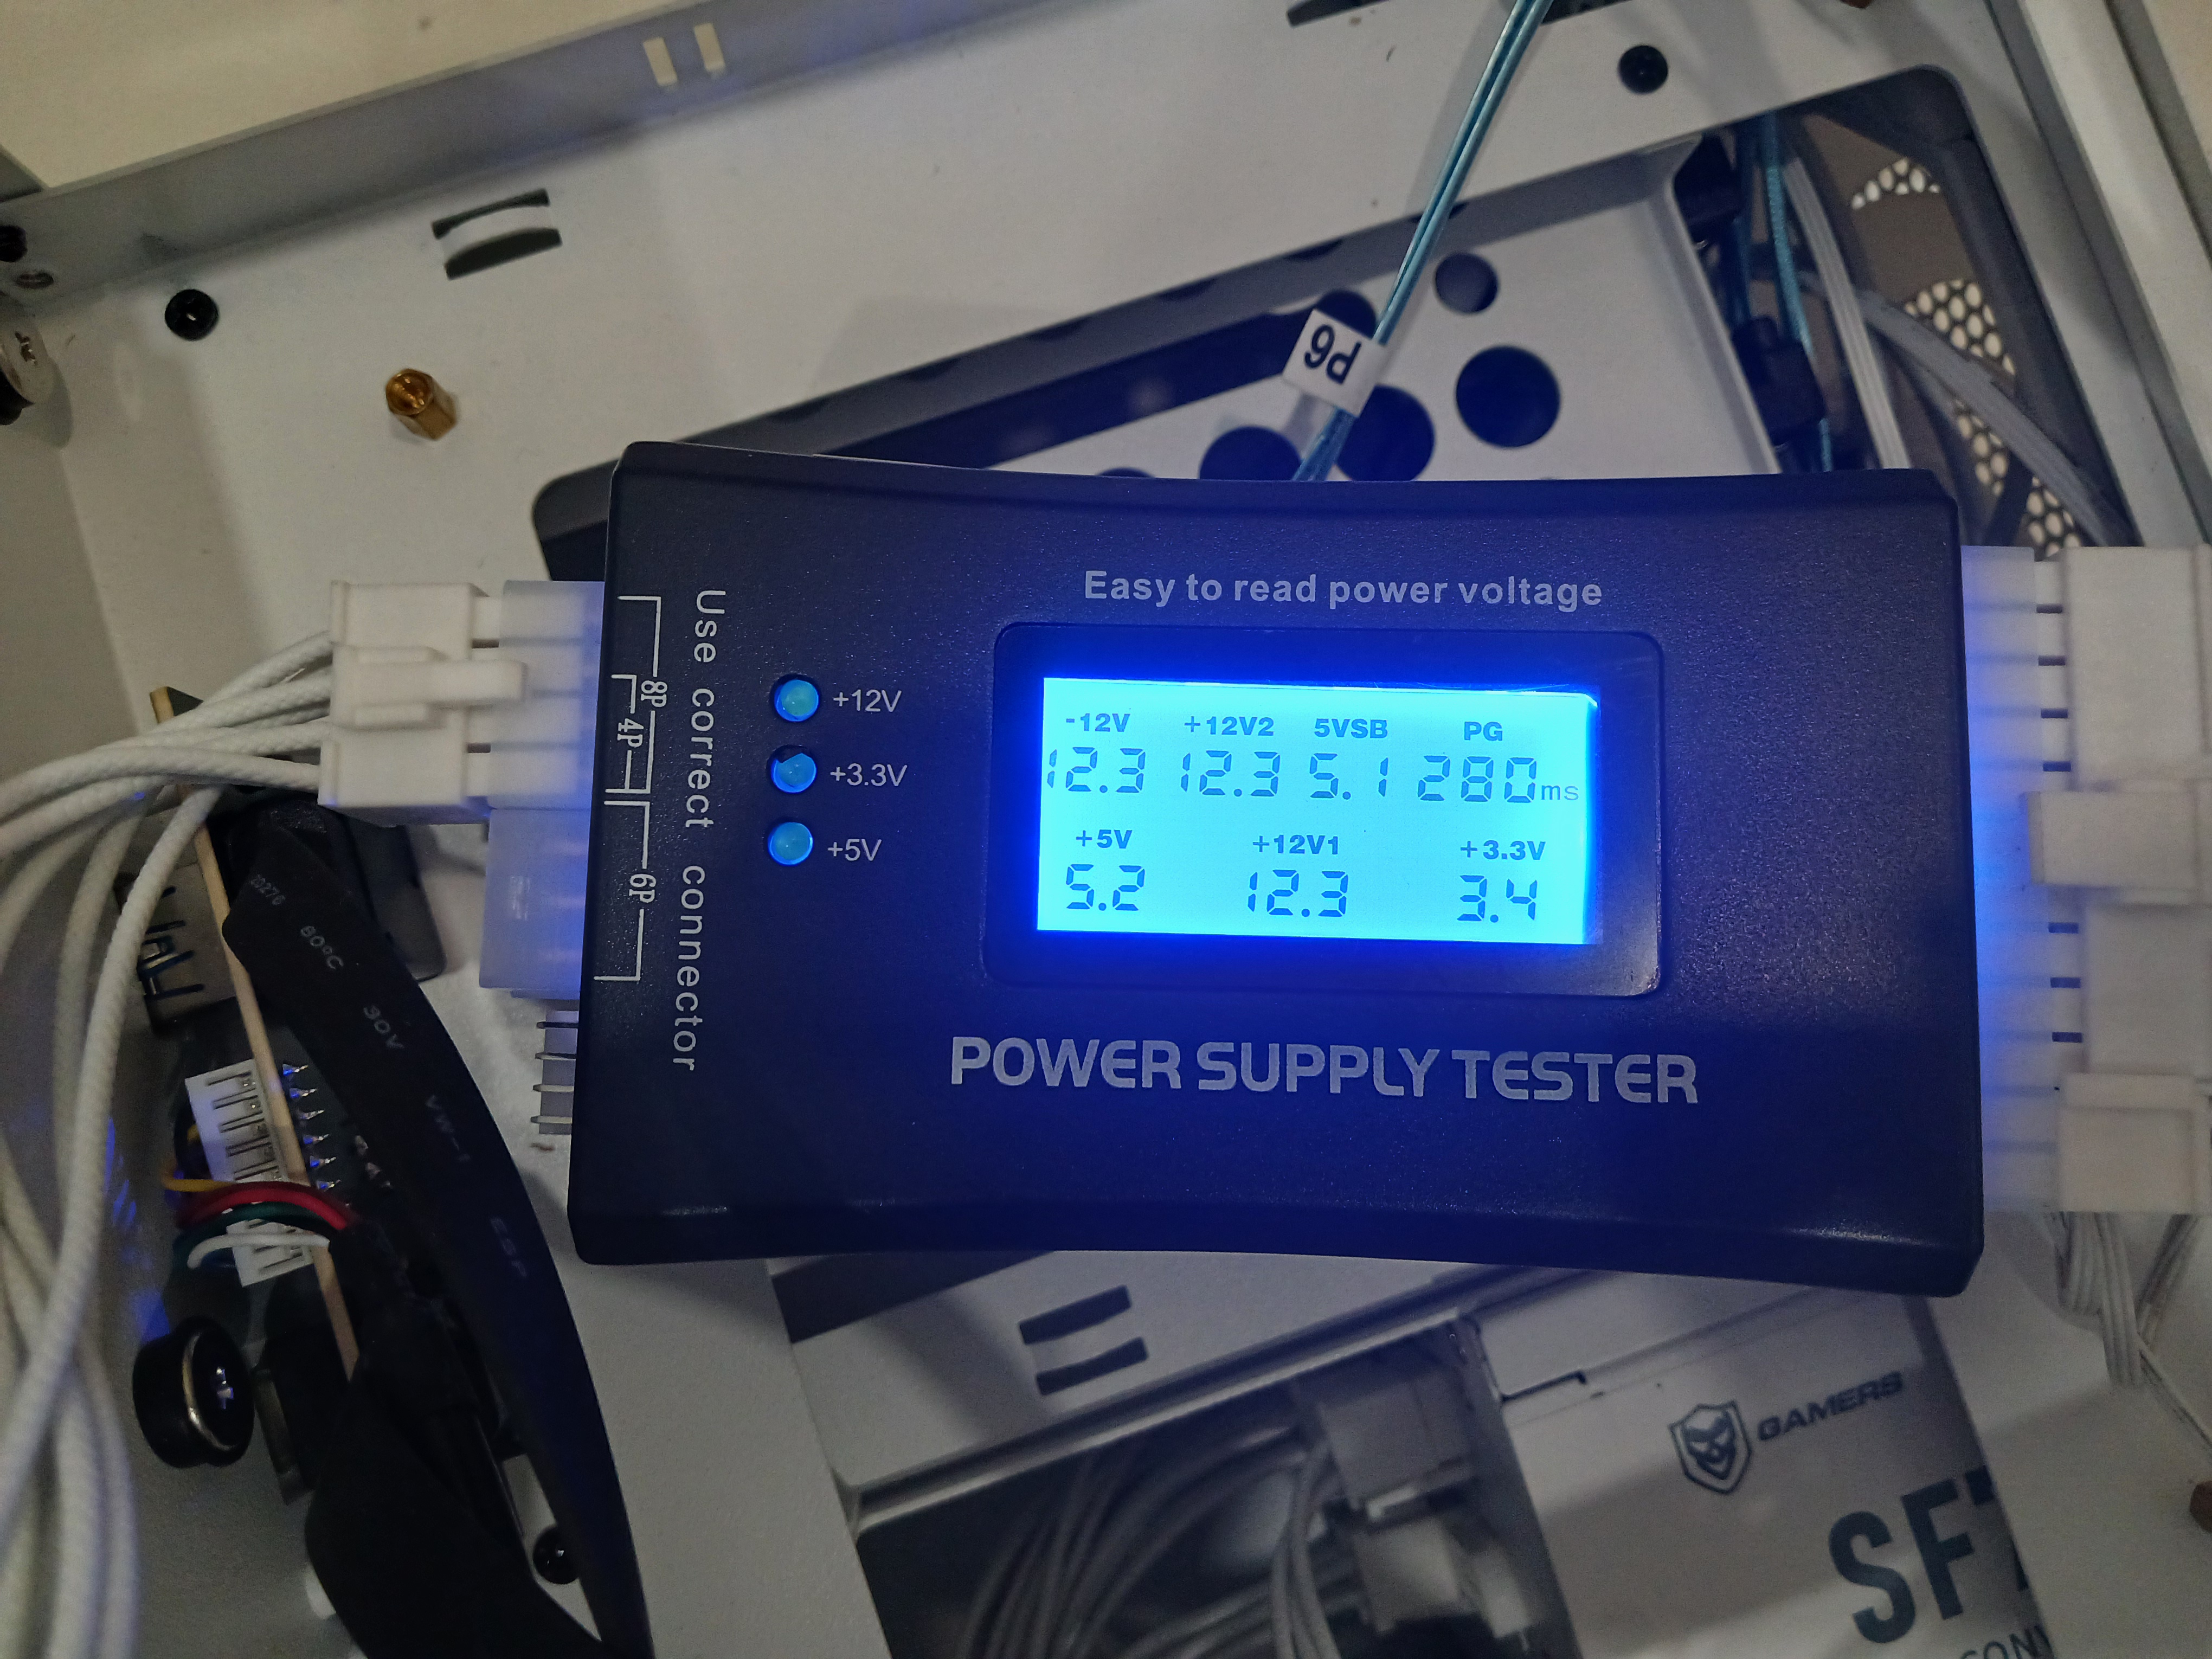
2.4 Power supply
Nothing fancy here, just a 750W SFX PSU. I got it for a steal, and it’s more than enough to power the system. Plus, it’s modular, so I can keep the cables tidy and the airflow unobstructed. Also got myself a PSU tester to make sure it’s working properly before plugging it in.
2.5 Hard drive
I opted for the WD Red Plus 4TB HDD—a reliable, NAS-optimized CMR drive that’s built for the kind of sustained, 24/7 workloads NAS systems demand. Then, to speed things up, I threw in a 128GB SSD NVME for the OS. No spinning platters slowing me down here!

The plan is to add more drives down the line as the storage needs grow, but for now, this setup is more than enough to get the job done. Because why rush perfection when you can build it at your own pace (or you know, money)?
2.6 Putting it all together


3 Operating system and software
For the operating system, I went with a barebone Ubuntu 24.04 LTS installation. It’s stable, lightweight, and perfect for running a DIY NAS without all the bloat that comes with pre-built solutions. Plus, Ubuntu’s wide support and extensive community make troubleshooting a breeze, which is a huge bonus when you’re building from scratch.
As for the storage setup, I’m starting off with just a single 4TB WD Red Plus drive, so there’s no RAID configured yet. Honestly, I didn’t feel the need for RAID at this stage. My uptime requirements aren’t mission-critical, and I’m not dealing with services that demands constant availability. And let’s be real: RAID is not a backup. While RAID can help with uptime and redundancy, it doesn’t protect against data corruption or accidental deletion. Instead, I follow the 3-2-1 backup strategy: three copies of my data, stored on two different media, with one copy offsite.
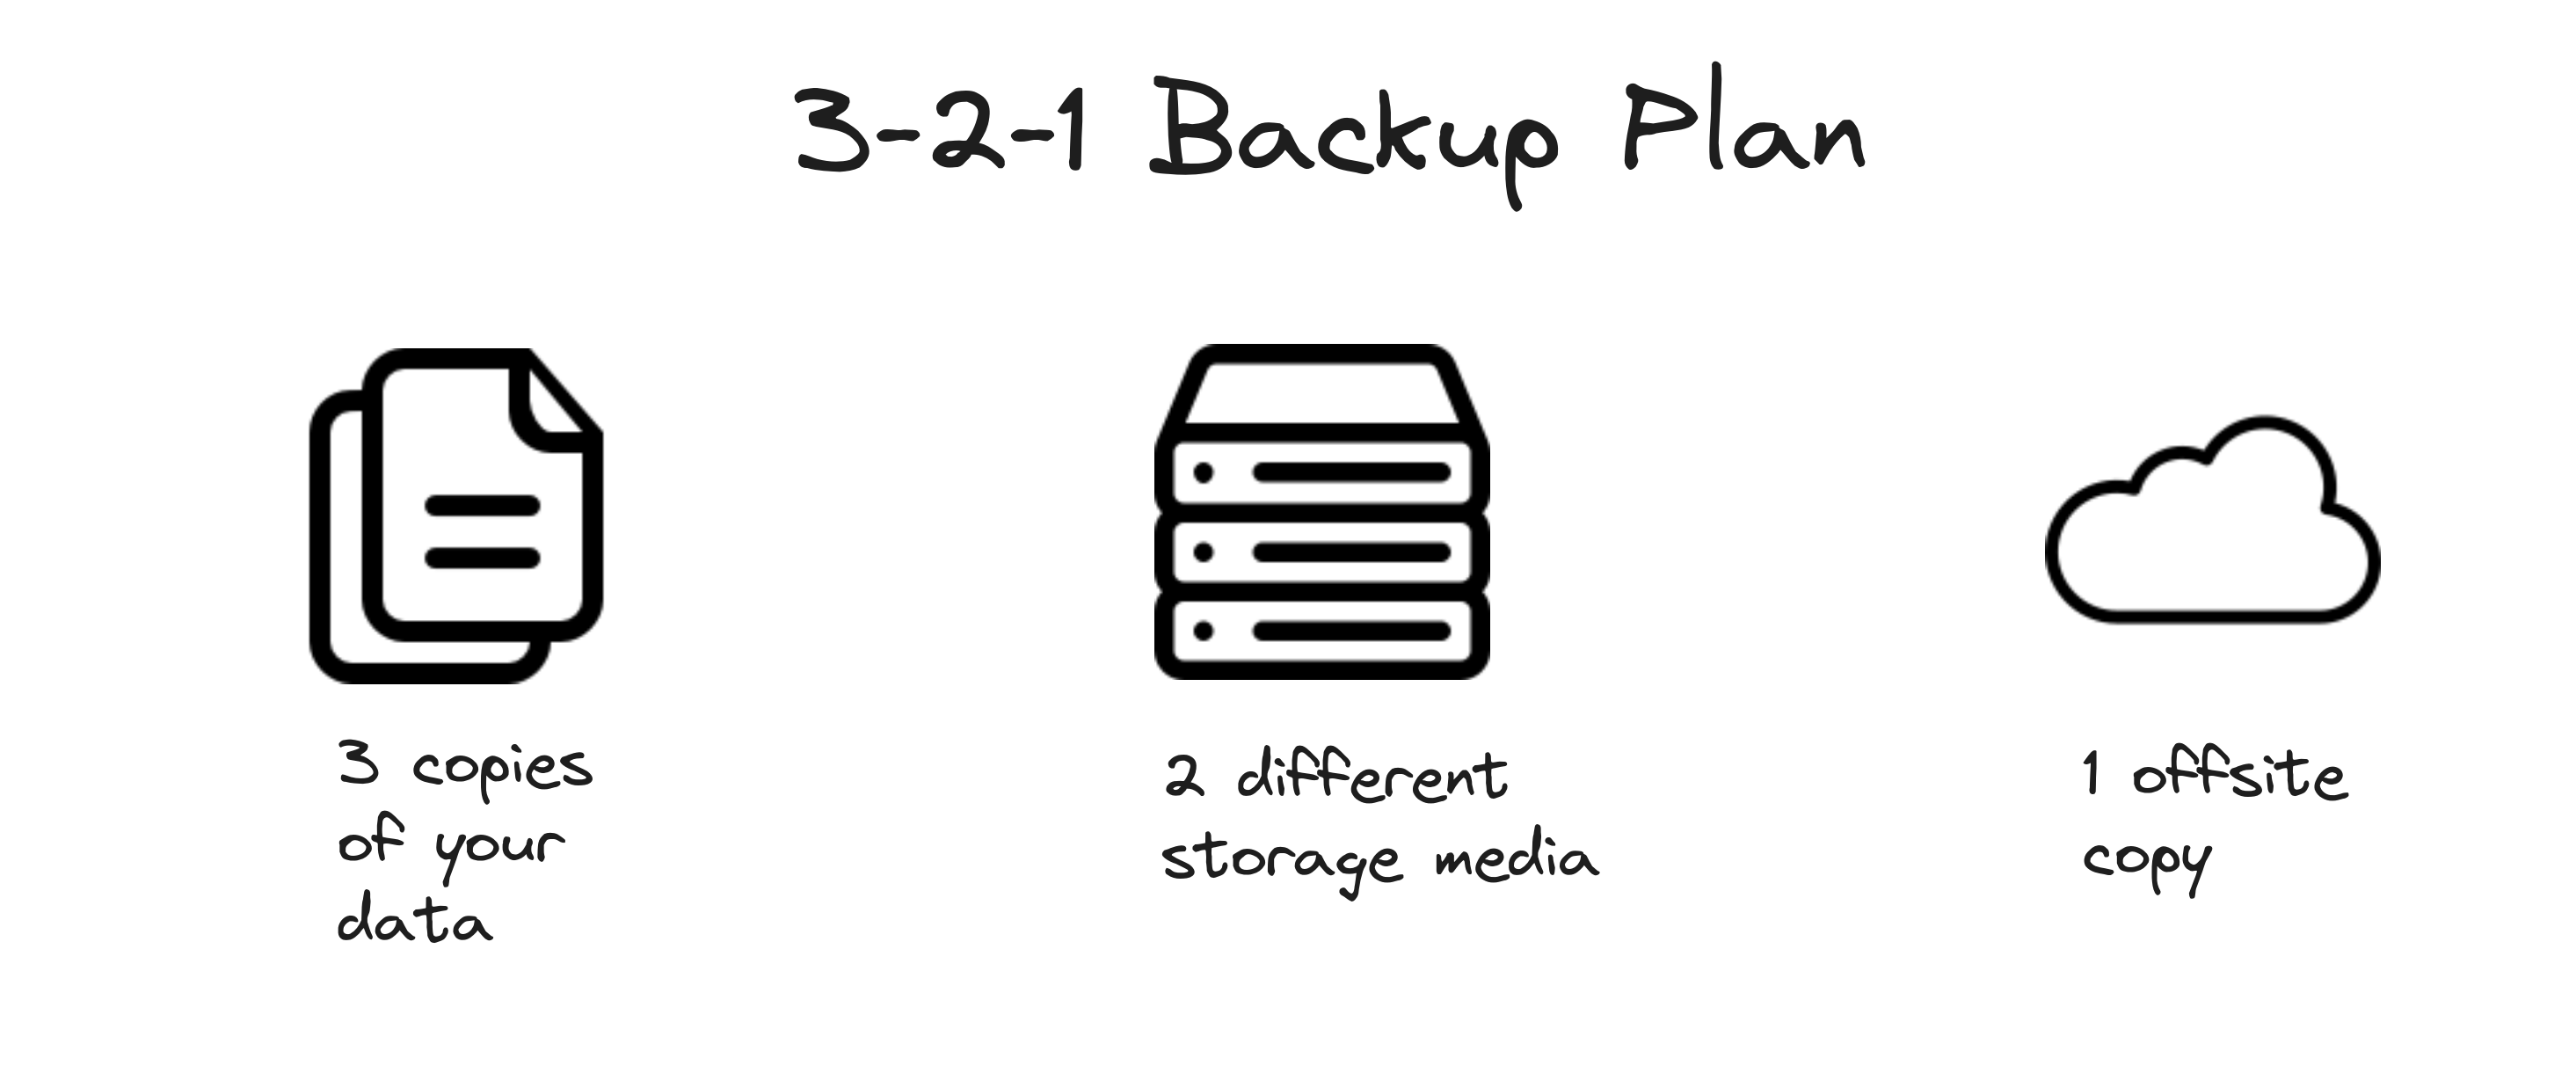
To implement this, I’ve set up a cronjob to back up my drive using Restic daily, which uploads my backups to a spare 1TB SSD and also to Backblaze for offsite cloud redundancy. It’s a simple but effective backup strategy that covers my bases without complicating things too much.
0 2 * * * /usr/bin/restic -r /mnt/ssd/restic-repo --verbose backup /mnt/hdd1 --exclude-file=/mnt/ssd/restic-repo/excludes.txt --password-file=pass.txt && /usr/bin/restic -r /mnt/ssd/restic-repo forget --keep-last 2 --pruneFor services, I’m hosting a few essentials to make my NAS more than just a storage server, you can access some of them via hub.ashpex.net:
- Plex: Media streaming for my movies, shows, and music.
- qBittorrent: For downloading Linux ISOs, of course.
- Immich: To manage and store my photos with a self-hosted touch.
- Audiobookshelf: A great tool for organizing and streaming my audiobook collection.
- AdGuard Home: Network-wide ad blocking—because who doesn’t want a smoother browsing experience?
- Portainer: For managing Docker containers with ease.
- Cockpit: A web-based server management tool for monitoring the health of my system and managing the hardware.
- FileBrowser: A simple and intuitive way to browse and manage files from the web interface.
- Glances: For real-time system monitoring, keeping an eye on CPU, memory, disk, and network usage.
4 Monitoring on the go
Aside from Glances, I also discovered ServerBox, a fantastic Android app that lets me monitor my server on the go. It’s a simple, lightweight tool that provides a real-time overview of my system’s health, including CPU, memory, disk usage, network activity, and Docker containers. Plus, it supports SSH for remote access, so I can manage my server without being tied to my desk. Another useful feature is its ability to access internal storage via SFTP, making it easy to transfer files or check on data when I’m away. It’s a perfect companion for server monitoring when I’m on the move or just away from my main workstation.
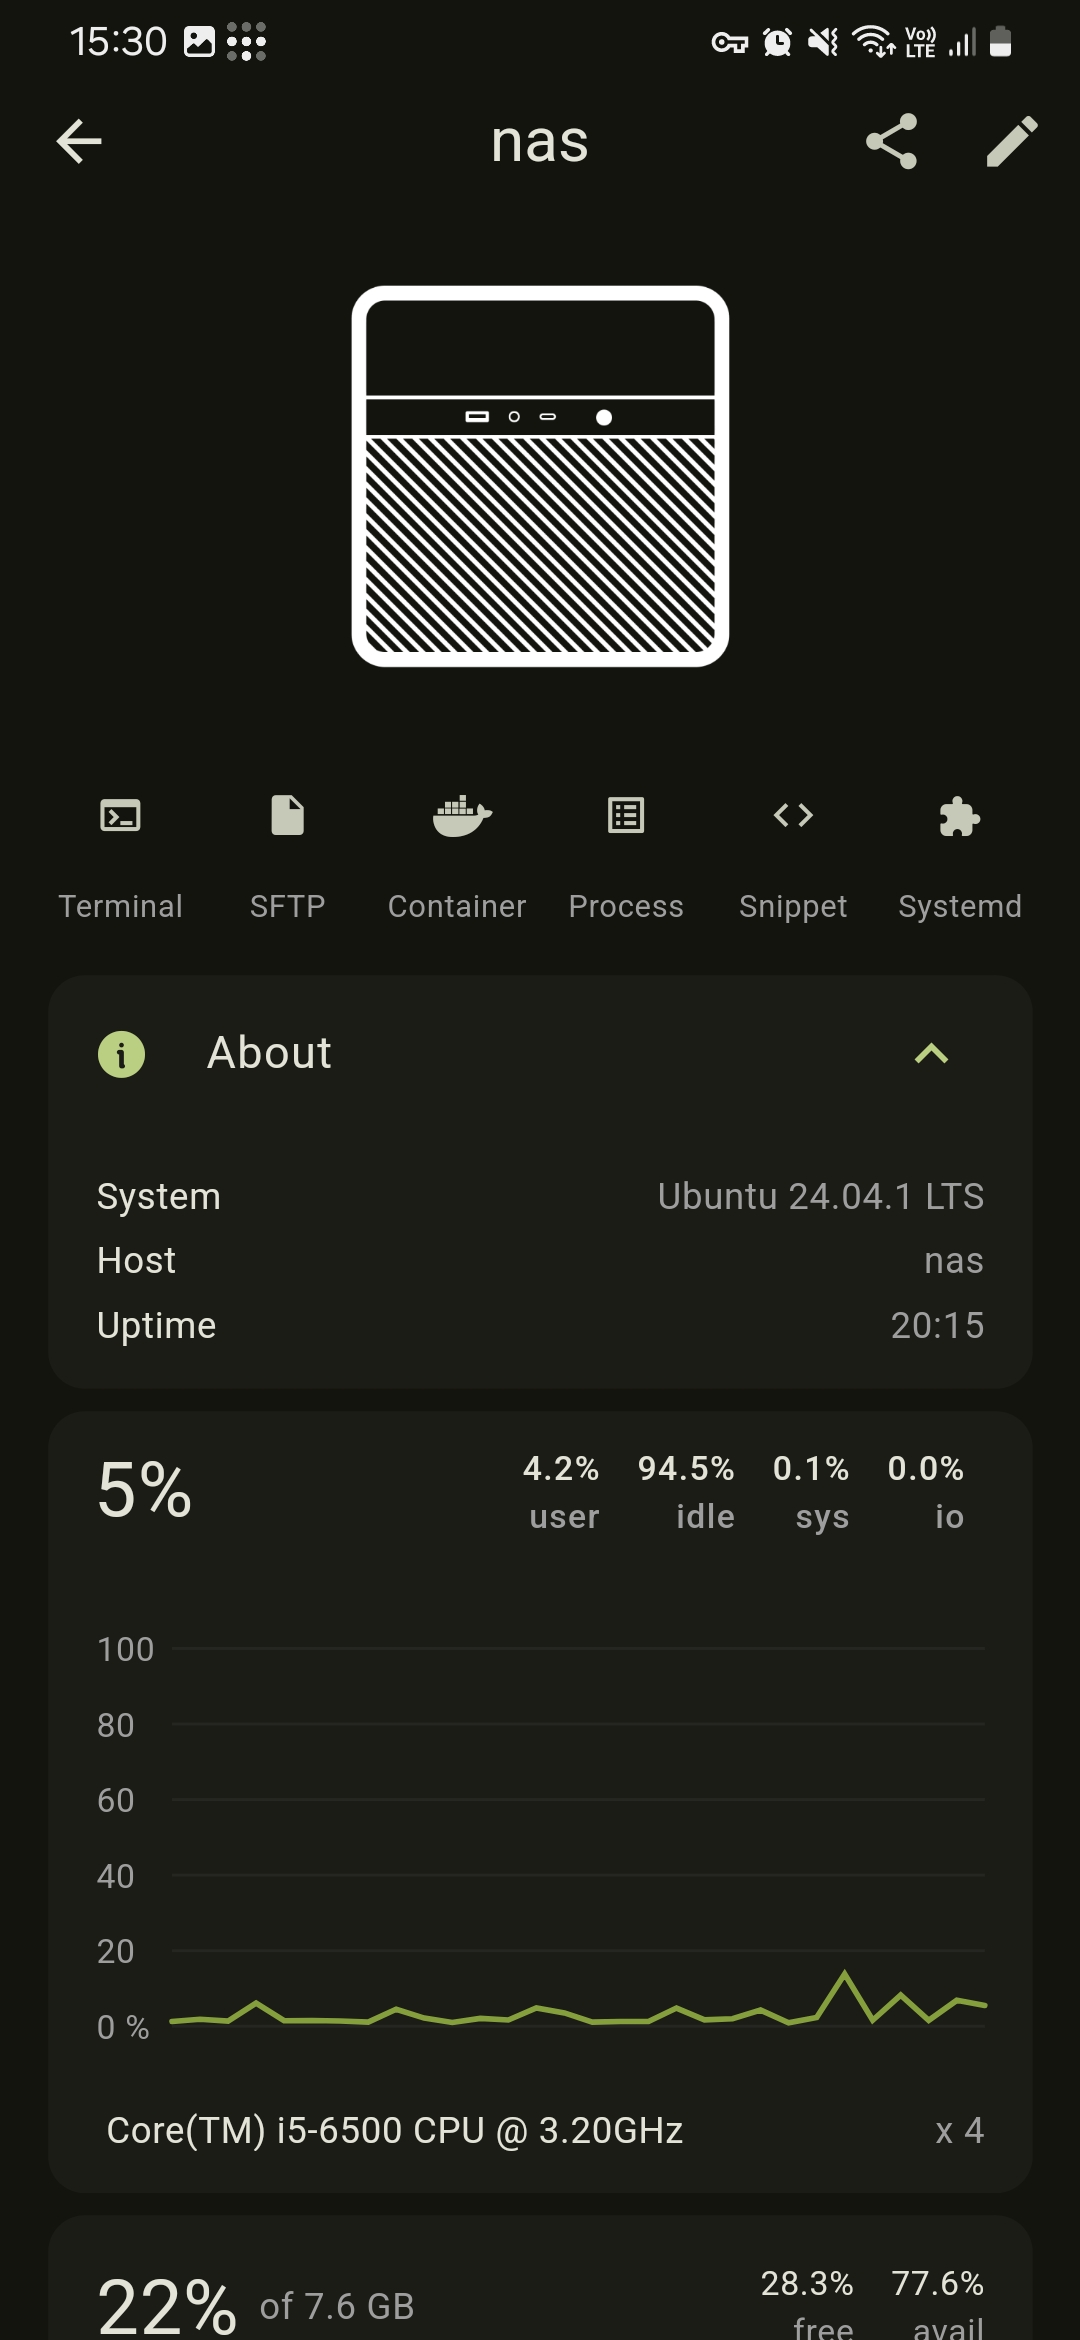
ServerBox dashboard
5 What’s about the Raspberry Pi 4?
I sold it to my senior colleague. She’s a tech enthusiast and I’m sure she’ll put it to good use. I’m happy that it’s going to someone who will appreciate it.

6 Conclusion
That’s it for now. My DIY NAS is up and running, and I couldn’t be happier with the results. It’s a beautiful, functional piece of tech that’s tailor-made to my needs, and I’m excited to see how it evolves as I add more drives and services.
 Support Me on Ko-Fi.com