My Journey to Self-hosting: Immich and Raspberry Pi for Personal Photos and Videos Storage
From Cloud to Closet: My Personal Adventure in Self-Hosting Photos and Videos with Immich and Raspberry Pi
Preserving memories is a human instinct. We have been doing it for centuries. From cave paintings to digital photos, we have come a long way.
And with the advent of internet, it has become easier and more accessible. But there is a catch, It’s called capitalism.
Google is asking for $9.99/month for 2TB of storage? Outrageous! I have better things to spend my money on than enriching Google’s coffers. I refuse to pay for more storage. I refuse to be a slave to capitalism.
Jokes aside, the convenience of easy access photos comes at a cost. A cost that is not always monetary. It is the cost of privacy and control. When you upload your photos to the cloud, you are giving up control over them. You are trusting a third party to keep them safe and secure. And we all know how that turned out with the infamous iCloud leaks.
And so, I decided to take matters into my own hands. The journey to self-hosting my photos and videos began.
TL;DR:
- I ran out of space on my Google Drive.
- I don’t trust Google with my photos.
- I refused to pay for more storage. (the main reason btw)
- I used to backup my photos to a hard drive. But it can’t be accessed from anywhere and anytime.
- I have a spare Raspberry Pi 4 lying around which I want to put to good use.
1 Setup
1.1 Hardware
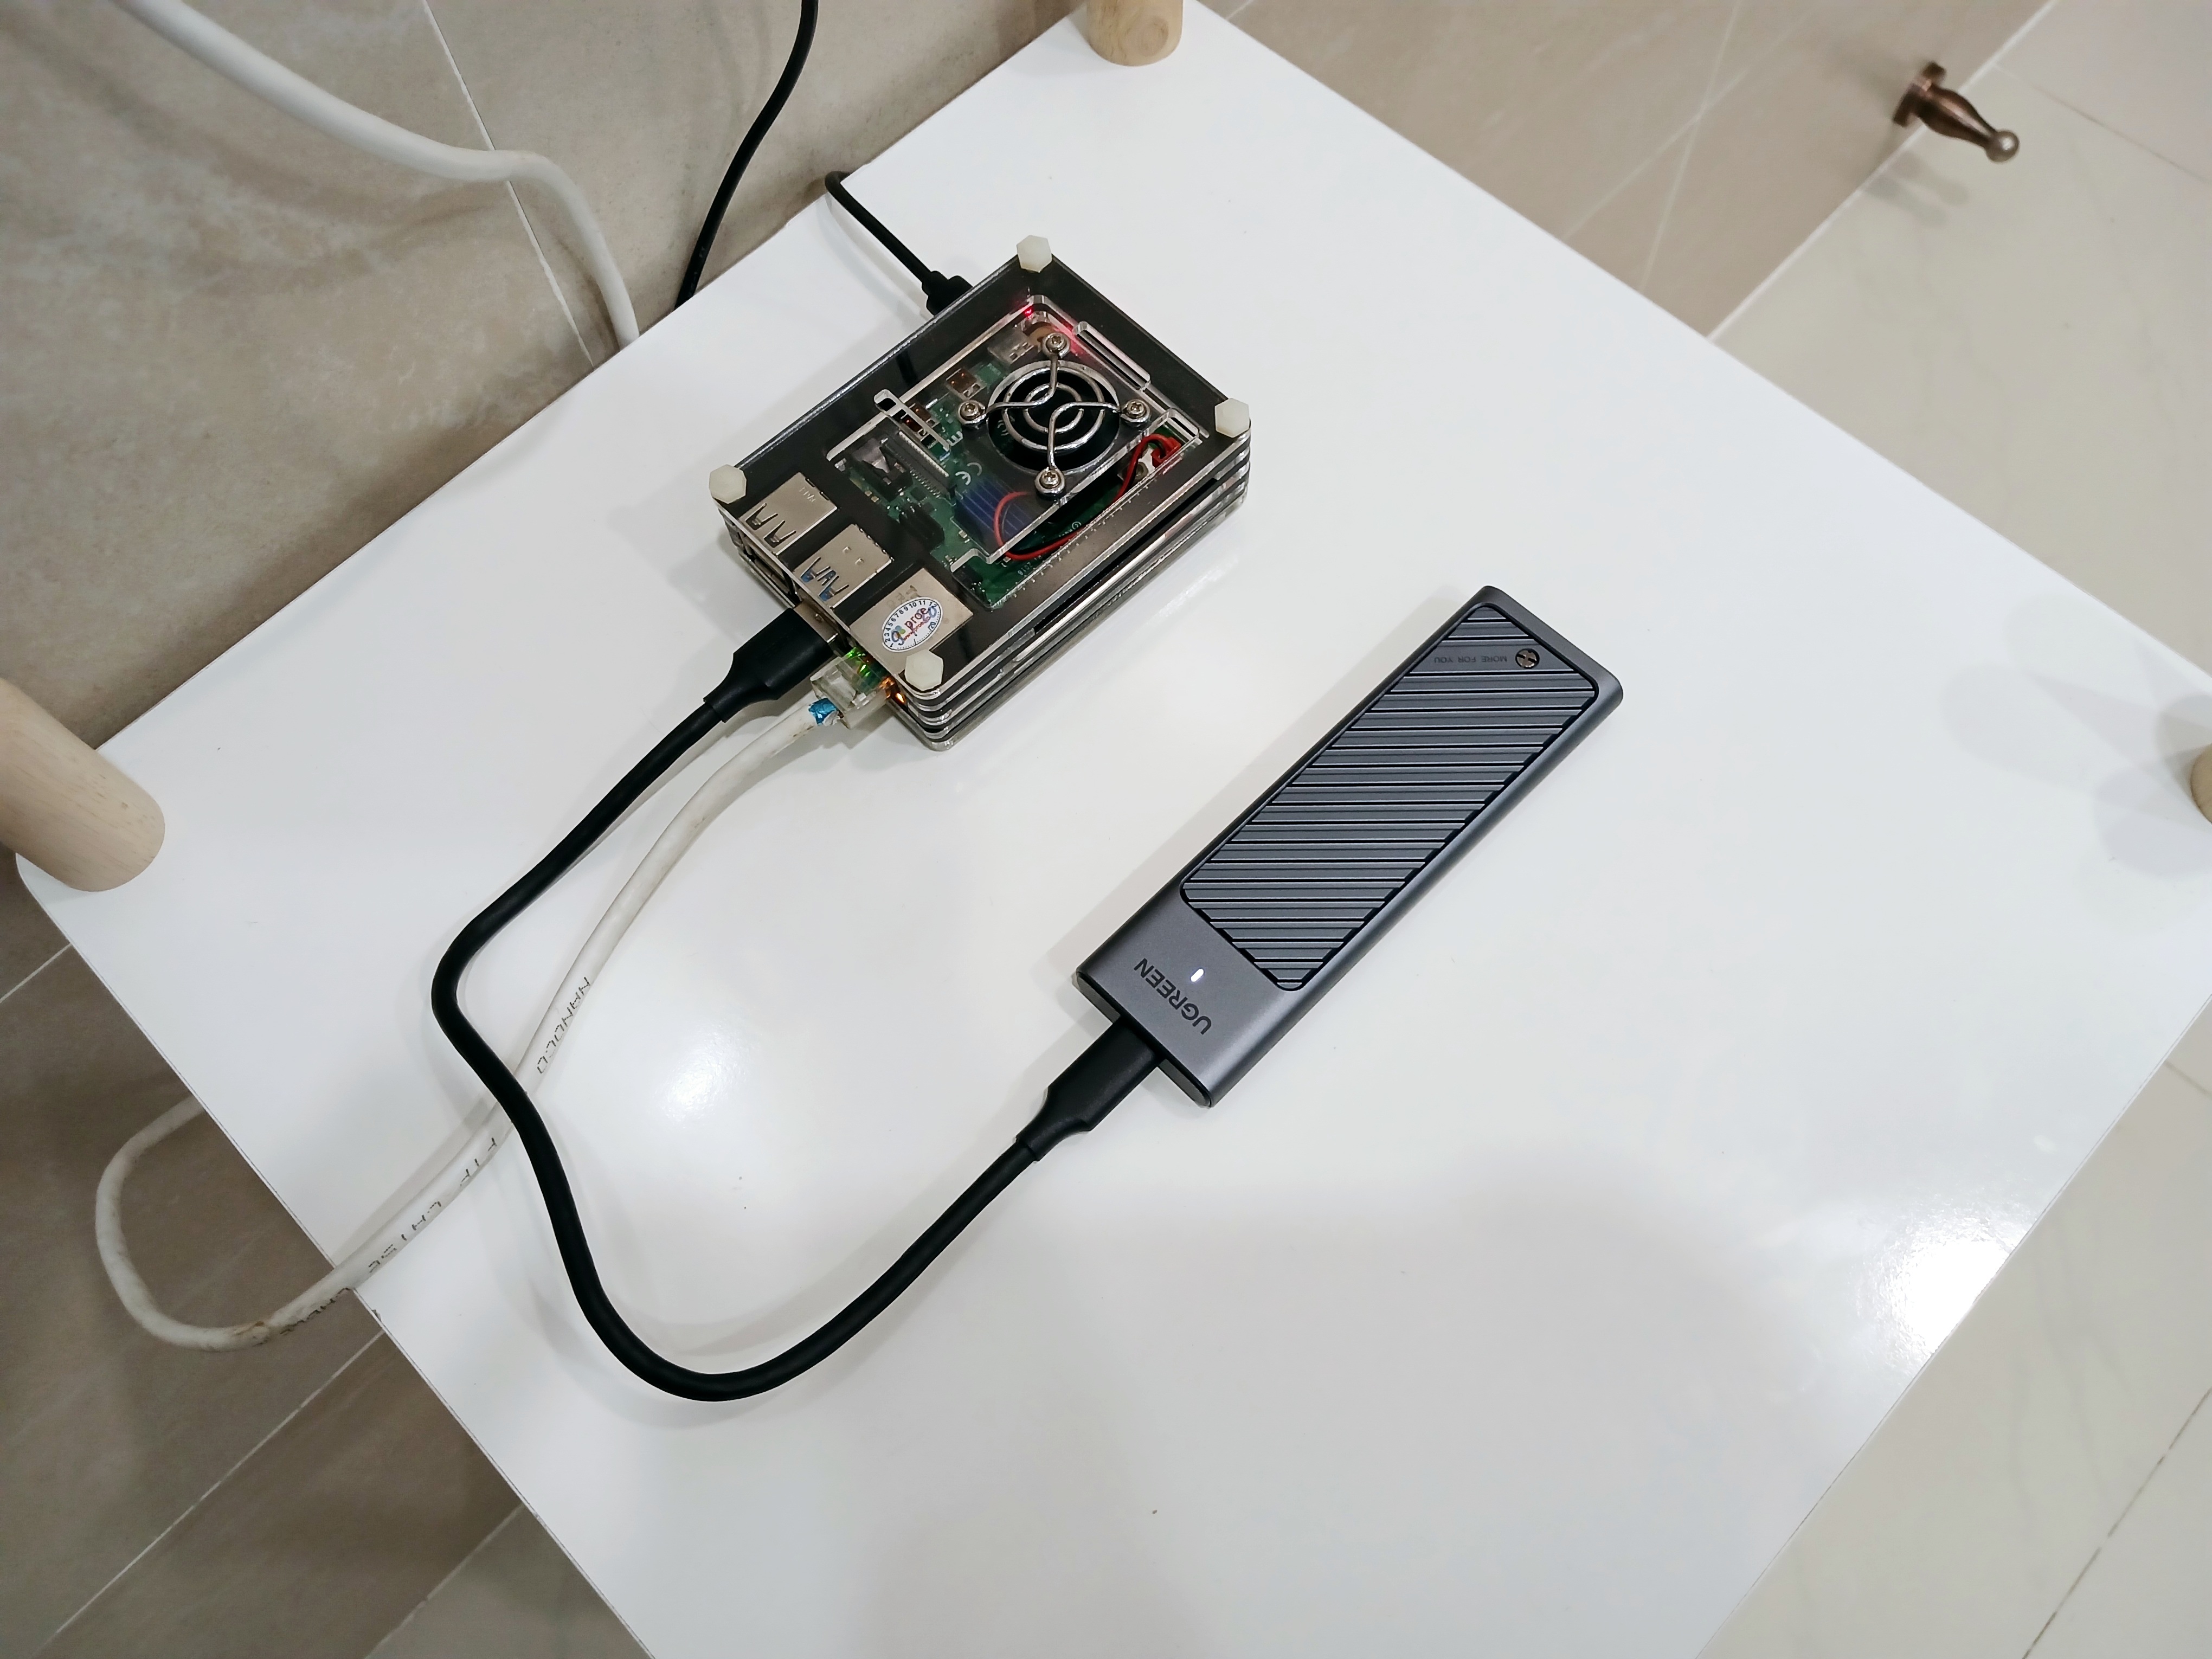
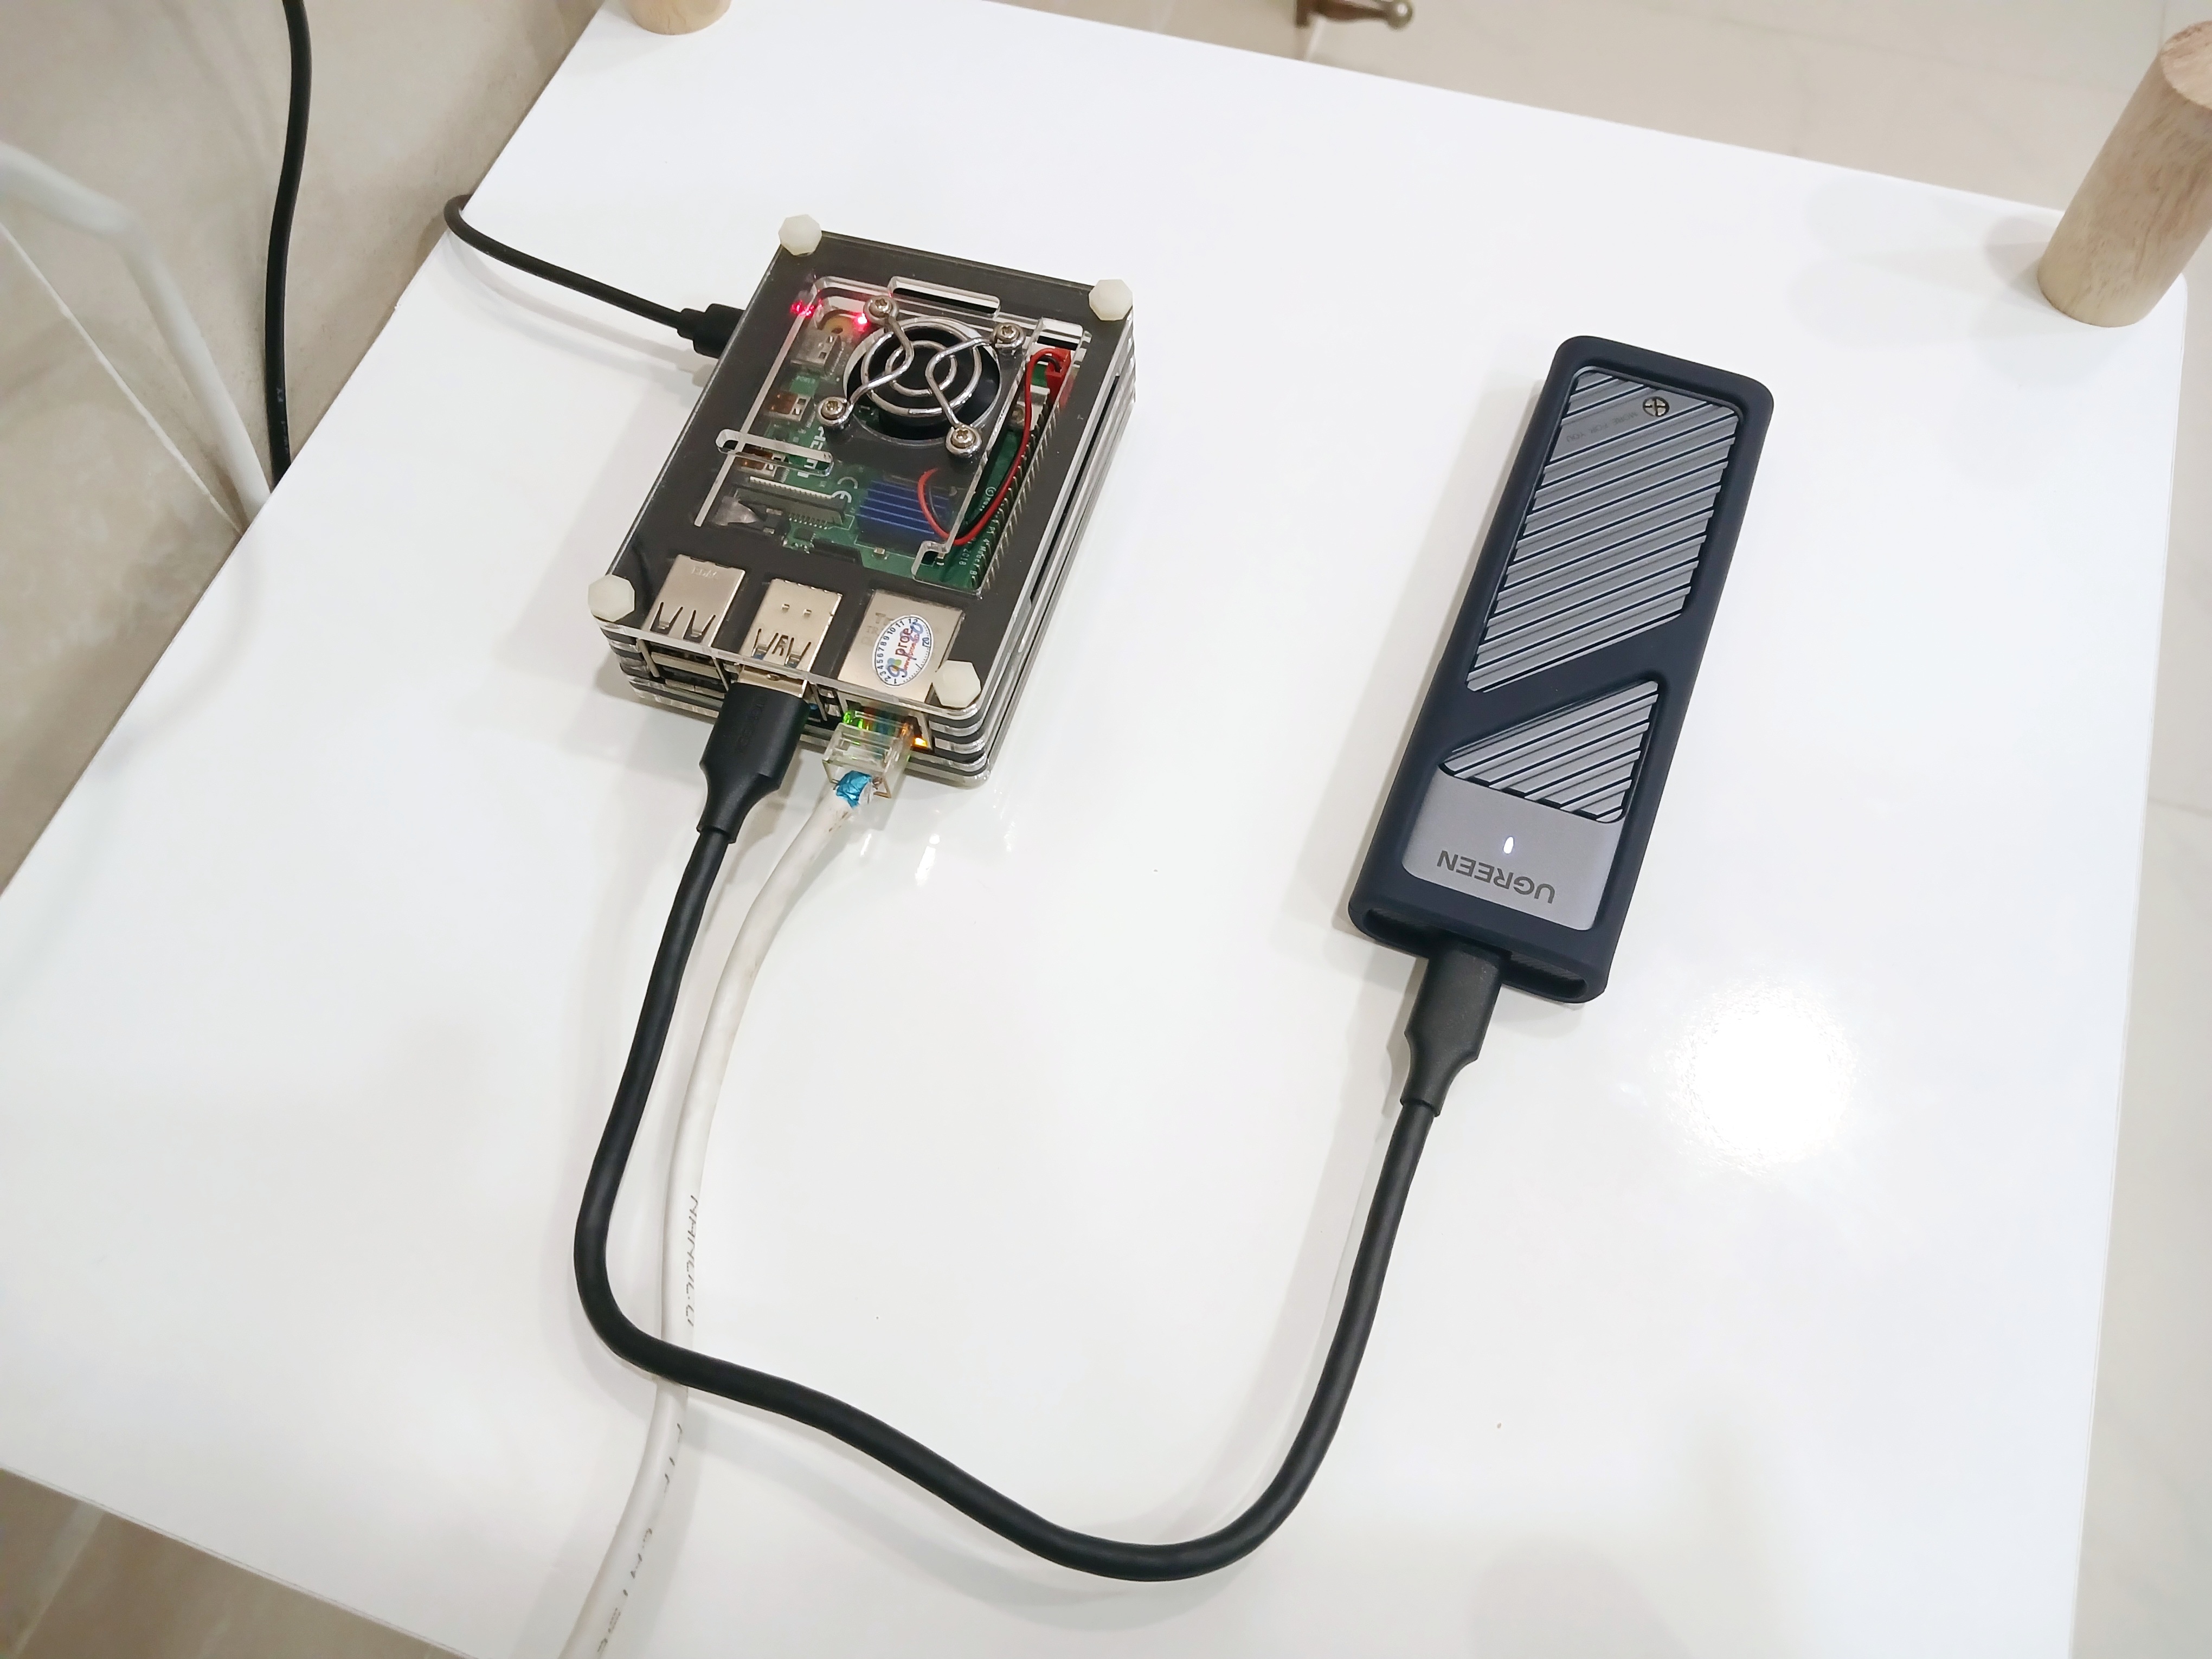
Server: Raspberry Pi 4 - 4GB RAM version (because 8GB is overkill, and also because I couldn’t find any 8GB in stock)
Storage: 1TB SSD (Ugreen SSD enclosure with 1TB Kioxia NVMe SSD)
Power: 5V 3A USB-C power adapter
Others: Ethernet cable (optional, but recommended)
1.2 Reasons for not using an external SSD

Using an SSD enclosure with an internal NVMe SSD for a server has several advantages over using an external SSD:
-
Performance: Internal NVMe SSDs are faster than external ones. While its irrelevant for the Raspberry Pi because of the USB 3.0 port limitation, but still a good point in case you want to take it out of the enclosure and use it in a PC and enjoy the full speed.
-
Durability and Reliability: Internal NVMe SSDs are more robust and reliable for continuous server use. They are designed to withstand higher workloads and have better endurance ratings compared to typical external SSDs.
-
Cooling: Many SSD enclosures offer better cooling solutions, such as heatsinks or fans, to prevent overheating.
-
Flexibility: Internal NVMe SSDs can be easily removed from the enclosure and used in a PC or another device if needed.
In the end, make use of what you already have, anything is better than a microSD card. This is just my suggestion. As for me, I will never buy another external SSD again.
2 Deploying Immich
We are gonna use docker compose to deploy Immich as it is the easiest way. In order to do that, we need a docker-compose.yml file. Let’s pull the latest docker-compose.yml file from the Immich repository.
wget https://github.com/immich-app/immich/releases/latest/download/docker-compose.ymlNext, to configure our deployment, we need to create a .env file. This file contains the environment variables that Immich uses.
wget -O .env https://github.com/immich-app/immich/releases/latest/download/example.envNow, open the .env file with your favorite text editor and fill in the required environment variables.
# You can find documentation for all the supported env variables at https://immich.app/docs/install/environment-variables

# The location where your uploaded files are stored
UPLOAD_LOCATION=/home/ashpex/immich/library
# The location where your database files are stored
DB_DATA_LOCATION=/home/ashpex/immich/postgres

# To set a timezone, uncomment the next line and change Etc/UTC to a TZ identifier from this list: https://en.wikipedia.org/wiki/List_of_tz_database_time_zones#List
# TZ=Etc/UTC

# The Immich version to use. You can pin this to a specific version like "v1.71.0"
IMMICH_VERSION=release

# Connection secret for postgres. You should change it to a random password
DB_PASSWORD=securepassword

# The values below this line do not need to be changed
###################################################################################
DB_USERNAME=postgres
DB_DATABASE_NAME=immich
The UPLOAD_LOCATION and DB_DATA_LOCATION are the directories where Immich will store the uploaded files and database files, respectively. Make sure these directories exist on your Raspberry Pi.
As I don’t want to enable machine learning features like: face detection, search, grouping, etc. I will disable them by adding the following lines to the .env file.
IMMICH_MACHINE_LEARNING_ENABLED=false
IMMICH_MACHINE_LEARNING_URL=false
Now, we are ready to deploy Immich. Run the following command to start Immich.
docker-compose up -dImmich should now be up and running. You can access it by navigating to http://<your-raspberry-pi-address>:2283 in your browser. To get the IP address of your Raspberry Pi, run the following command:
hostname -I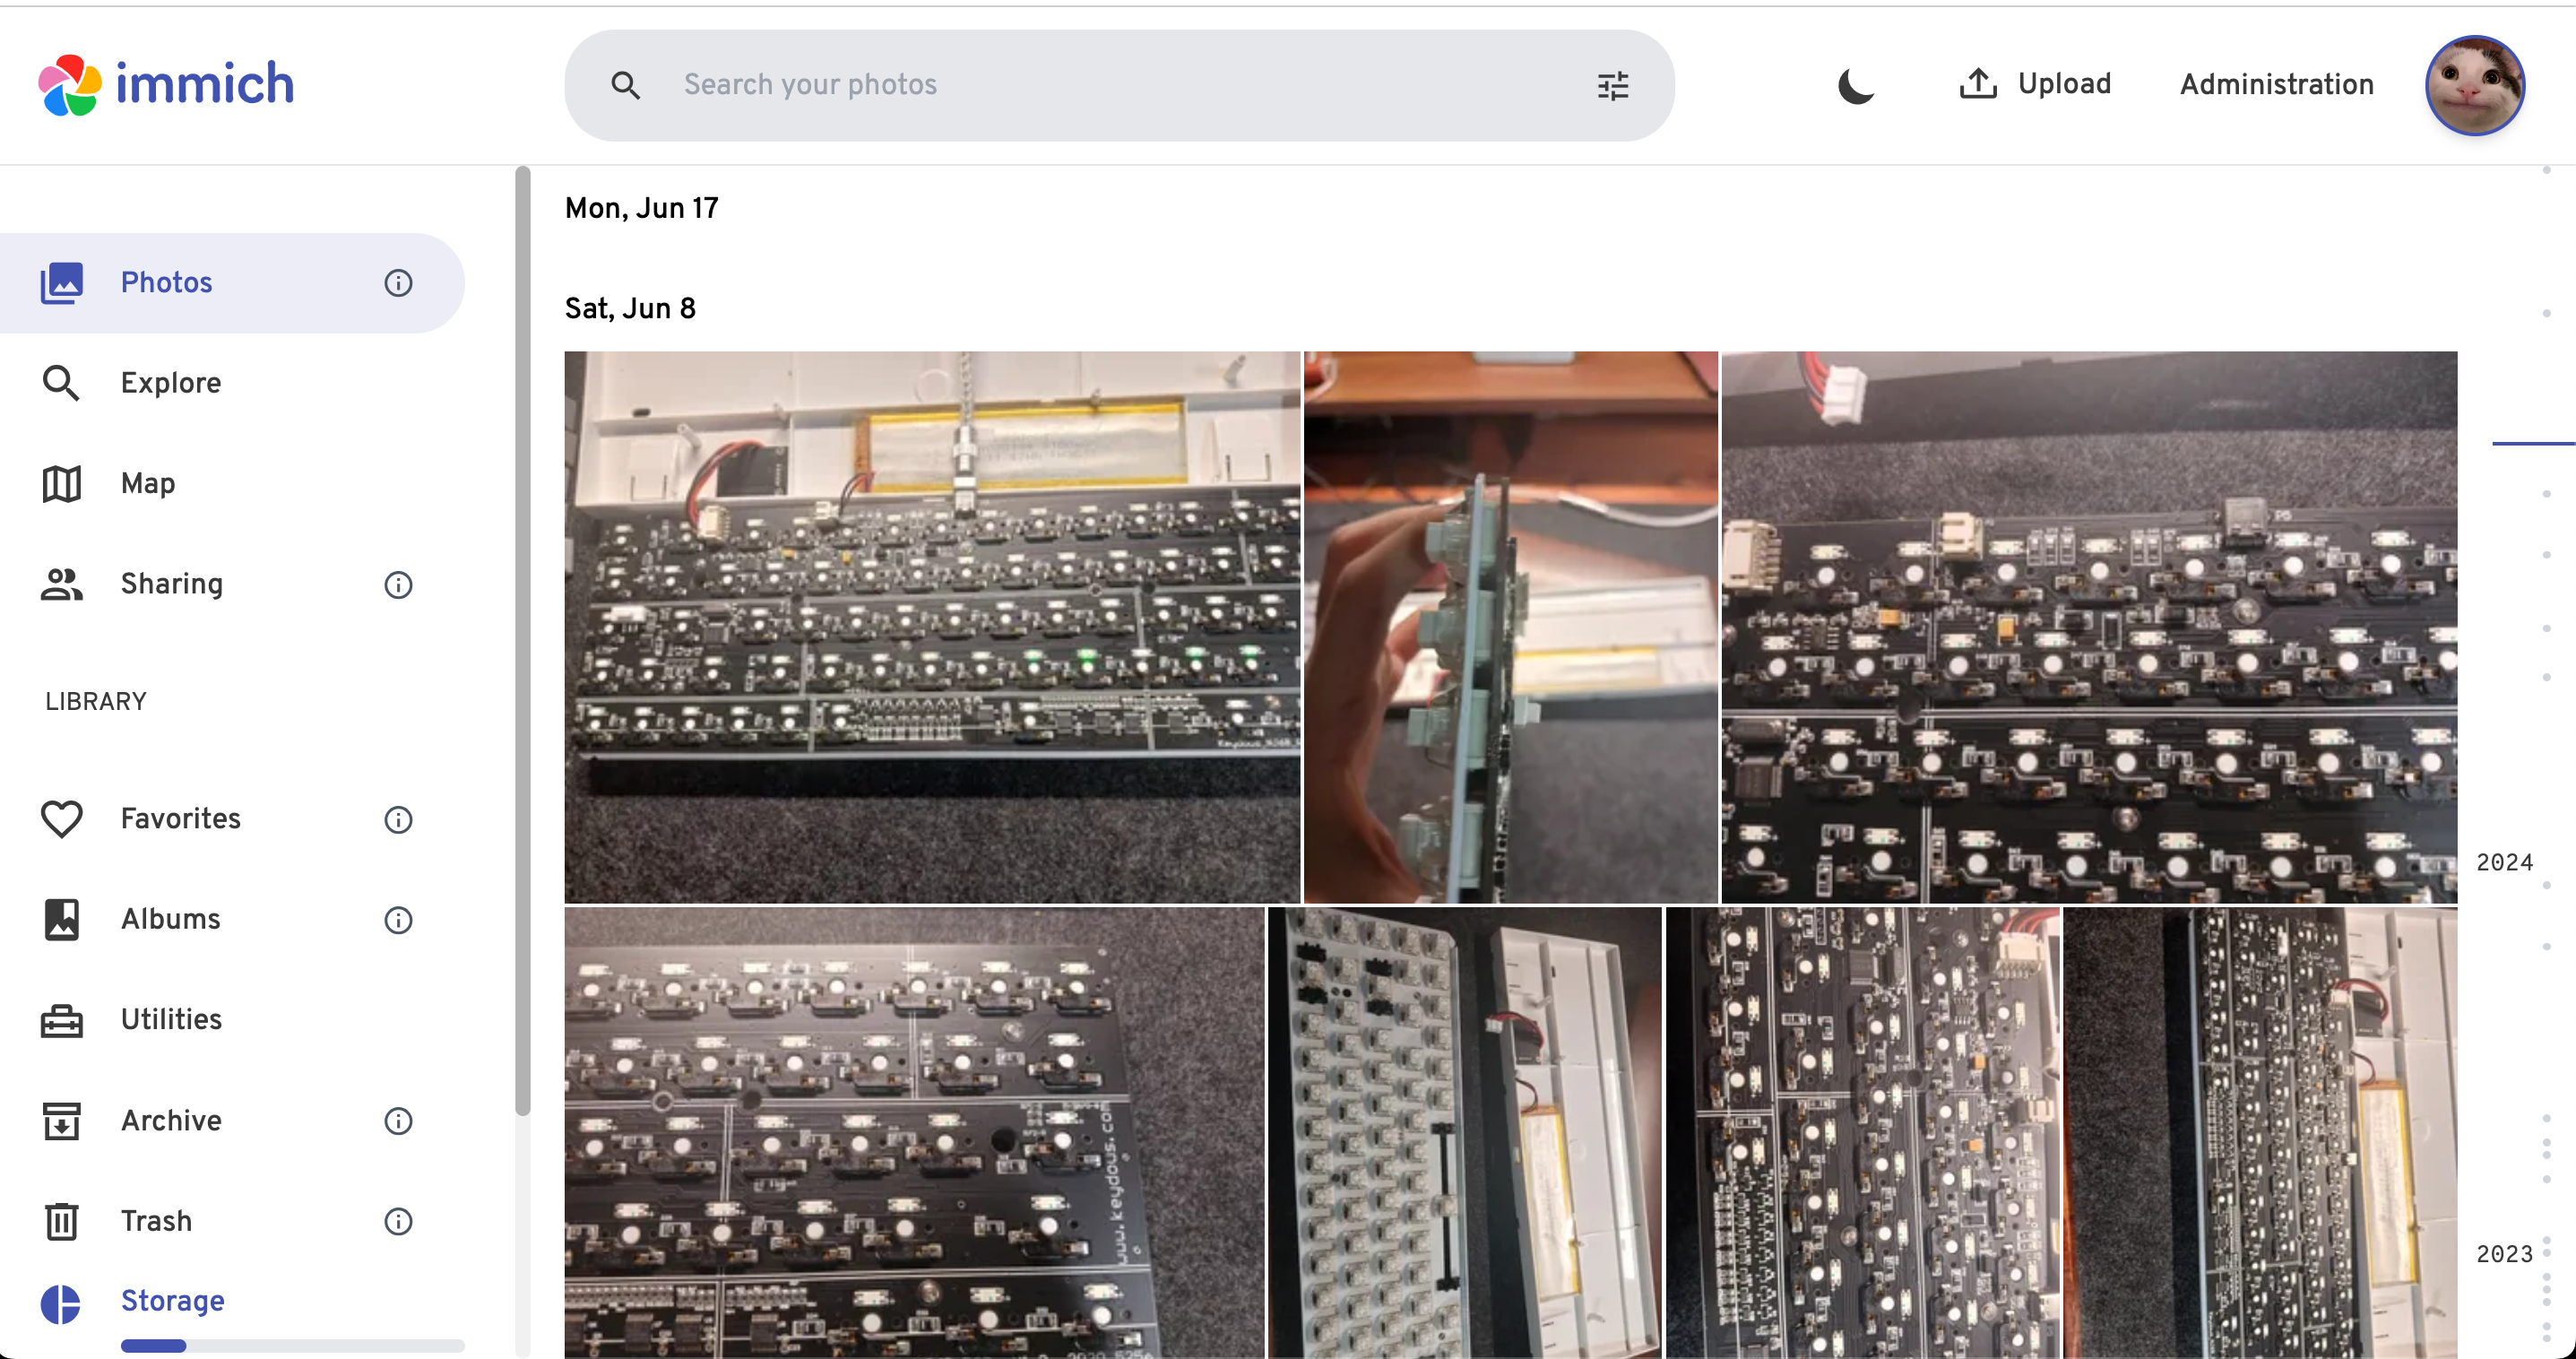
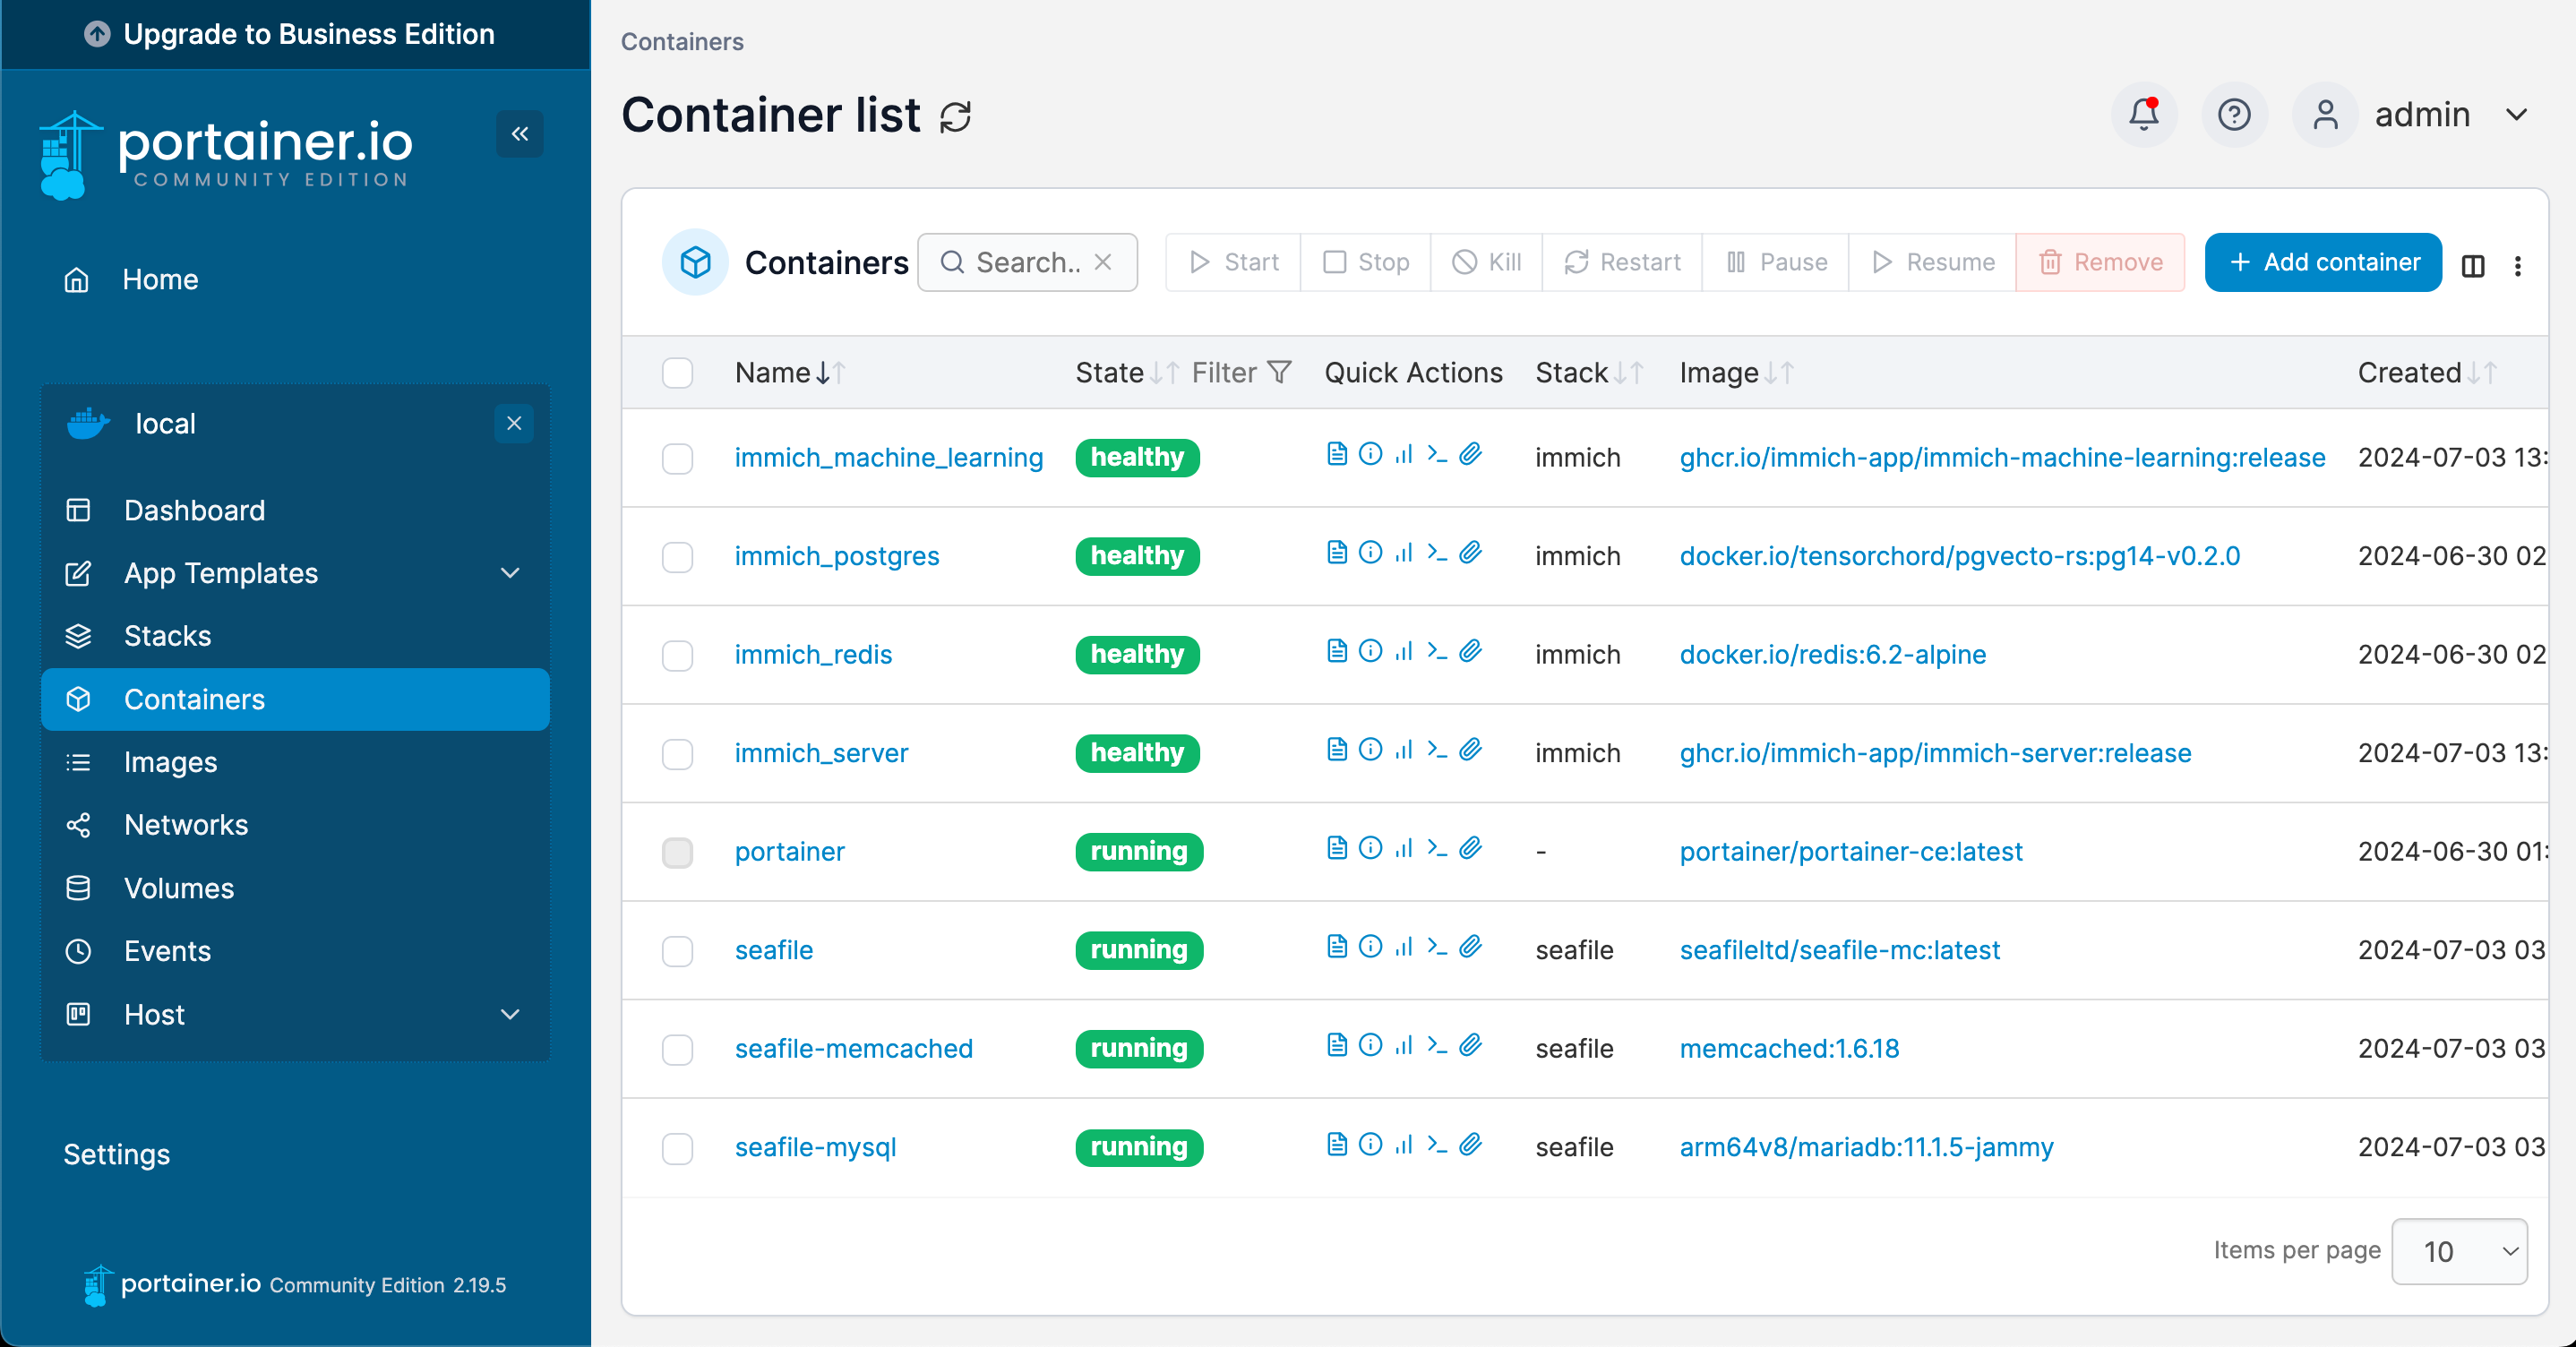
To manage your docker containers easily, I strongly recommend installing Portainer as well.
3 Accessing Immich from everywhere
So far so good. Immich is up and running on Raspberry Pi. But there is an elephant in the room. How do I access Immich from outside my home network? The main reason I wanted to self-host Immich was to have easy access to my photos from anywhere. Home IP addresses are not static, they change frequently. Static IP addresses are expensive (again, capitalism). So, what solution are we left with?
3.1 Dynamic DNS
Dynamic DNS (DDNS) is a service that automatically updates the DNS records of a domain name whenever the IP address of the server changes. In practice, it works like this:
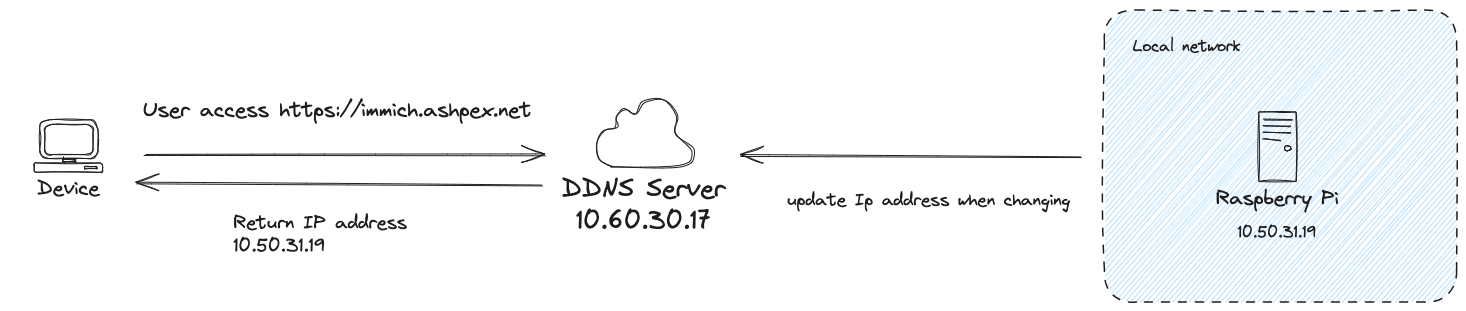
- Sign up for a DDNS service and create a hostname (e.g., immich.ashpex.net).
- Install a DDNS client on my Pi that periodically checks my public IP address and updates the DNS records of my domain name (immich.ashpex.net).
- When I want to access my server, I use the domain name (e.g., immich.ashpex.net) instead of the IP address.
Popular DDNS services are Duck DNS, No-IP, and Cloudflare.
- Free: Most DDNS services are free.
- Easy to set up.
- Reliability: DDNS services can be unreliable and slow to update.
- Security: Requires you to open ports on your router, exposed to the internet. Everyone can access my server if they know the domain name, not really excited about this.
3.2 VPN
- Deploy a VPN server (Wireguard) on a VPS.
- Route traffic from the Pi through the VPN server.
This way, the Pi will have a static IP address (the IP address of the VPN server) and be accessible from anywhere.
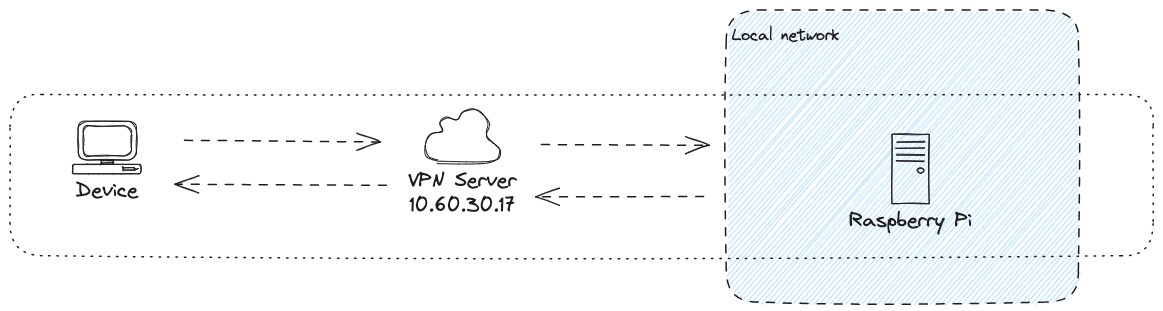
- Secure: All traffic is encrypted.
- Easy to set up: Wireguard is easy to set up and configure.
- Cost: Requires a VPS, which costs money.
3.3 Zero Trust Networking
Bassicaly a server that takes care of NAT traversal that help individual nodes so that they can establish a peer-to-peer connection. Some popular services are Tailscale, ZeroTier, and NetMaker. They all use Wireguard under the hood.
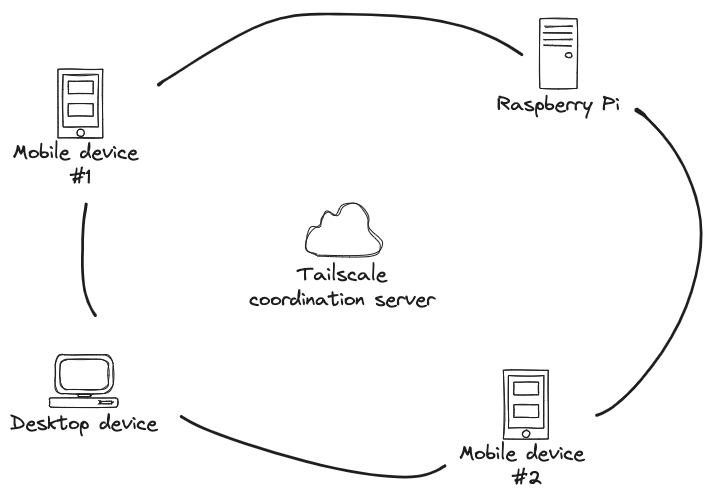
- Easy to set up: All you need is a Tailscale account and install the Tailscale client on your devices.
- Secure: All traffic is encrypted.
- Free for personal use: Tailscale is free for personal use (up to 100 devices).
- No need for static IP addresses or port forwarding.
In the end, I decided to go with Tailscale. It was a no-brainer. To install Tailscale on Raspberry Pi, follow these steps:
First, we need to add tailscale repository to Raspberry Pi Os.
sudo apt install lsb-release curl
curl -L https://pkgs.tailscale.com/stable/raspbian/$(lsb_release -cs).noarmor.gpg | sudo tee /usr/share/keyrings/tailscale-archive-keyring.gpg >/dev/null
echo "deb [signed-by=/usr/share/keyrings/tailscale-archive-keyring.gpg] https://pkgs.tailscale.com/stable/raspbian $(lsb_release -cs) main" | sudo tee  /etc/apt/sources.list.d/tailscale.list
sudo apt update
Proceed to install tailscale.
sudo apt install tailscale
sudo tailscale up
You will be asked to authenticate with your Tailscale account. After that, its done. You can now access your Raspberry Pi from anywhere using the Tailscale IP address as long as you have the Tailscale client installed on your device.
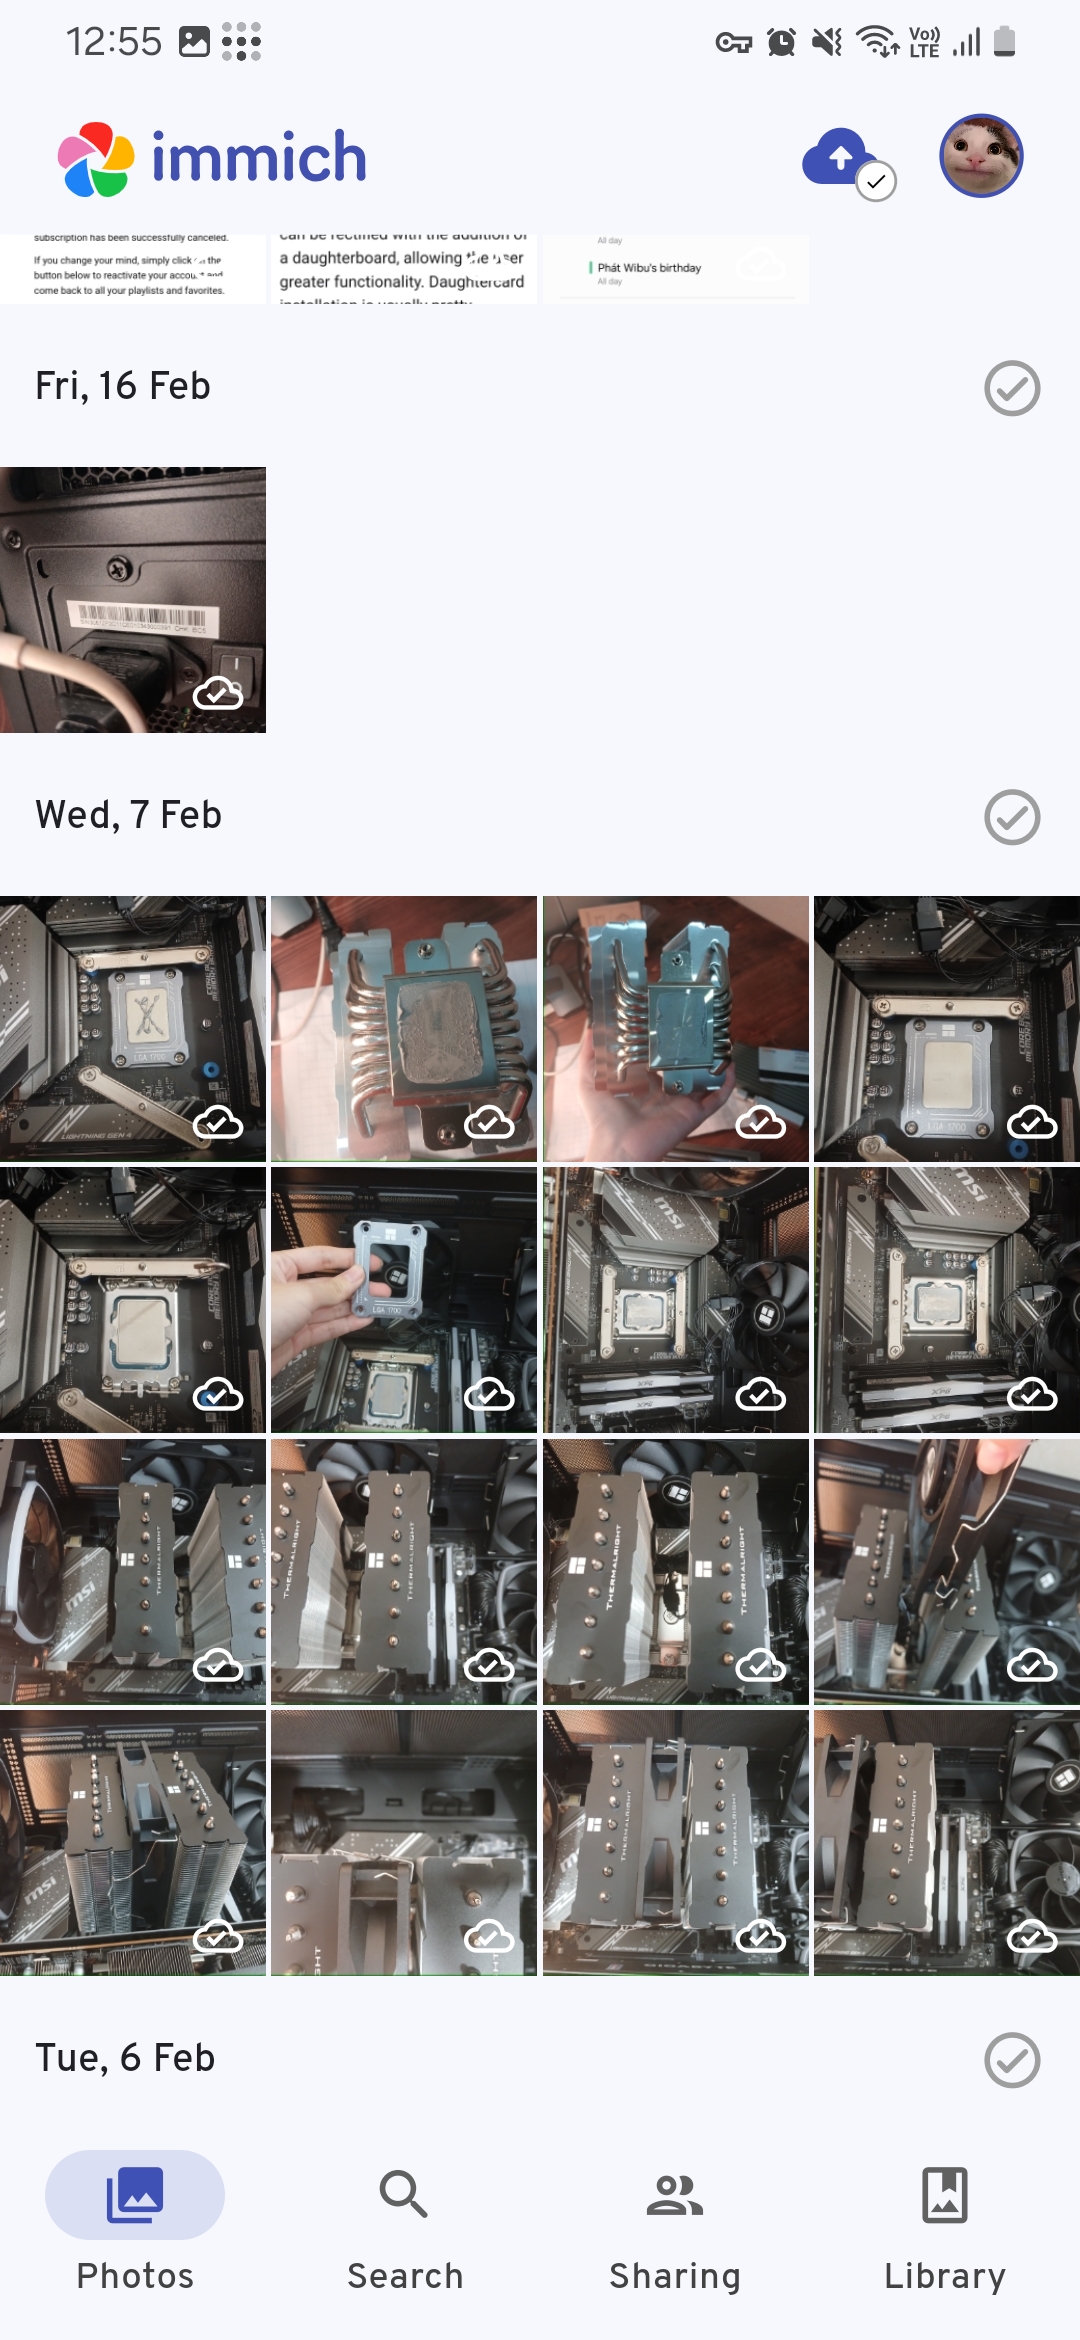
Immich app
Voila! All my photos are now synced from my phone to my Raspberry Pi. No more reliance on Google Photos or any other cloud service.
4 Monitoring
htop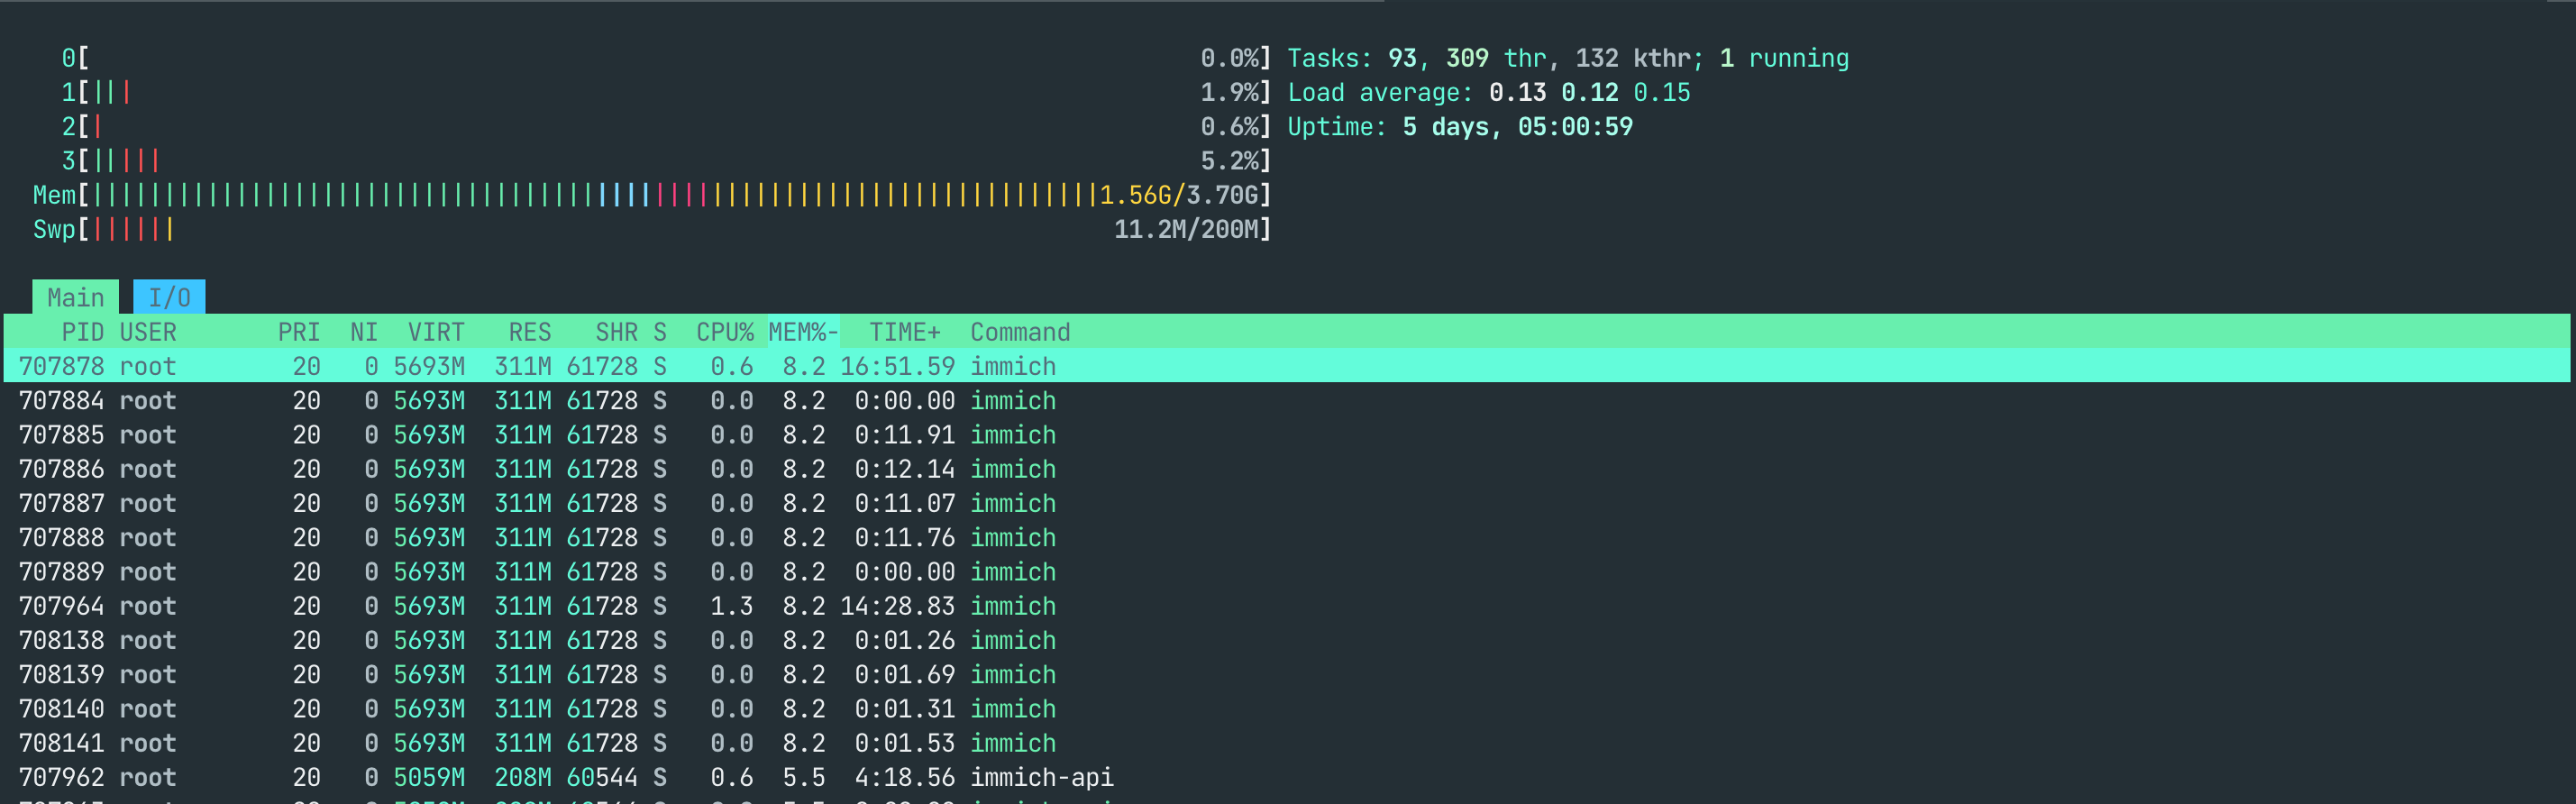
Looking pretty good with the ram consumption and cpu usage (if barly any usage at all). Immich takes up 500 MB of RAM, the remaining RAM consumption is taken by my Seafile server.
Now let’s check the Pi’s temperature.
vcgencmd measure_temp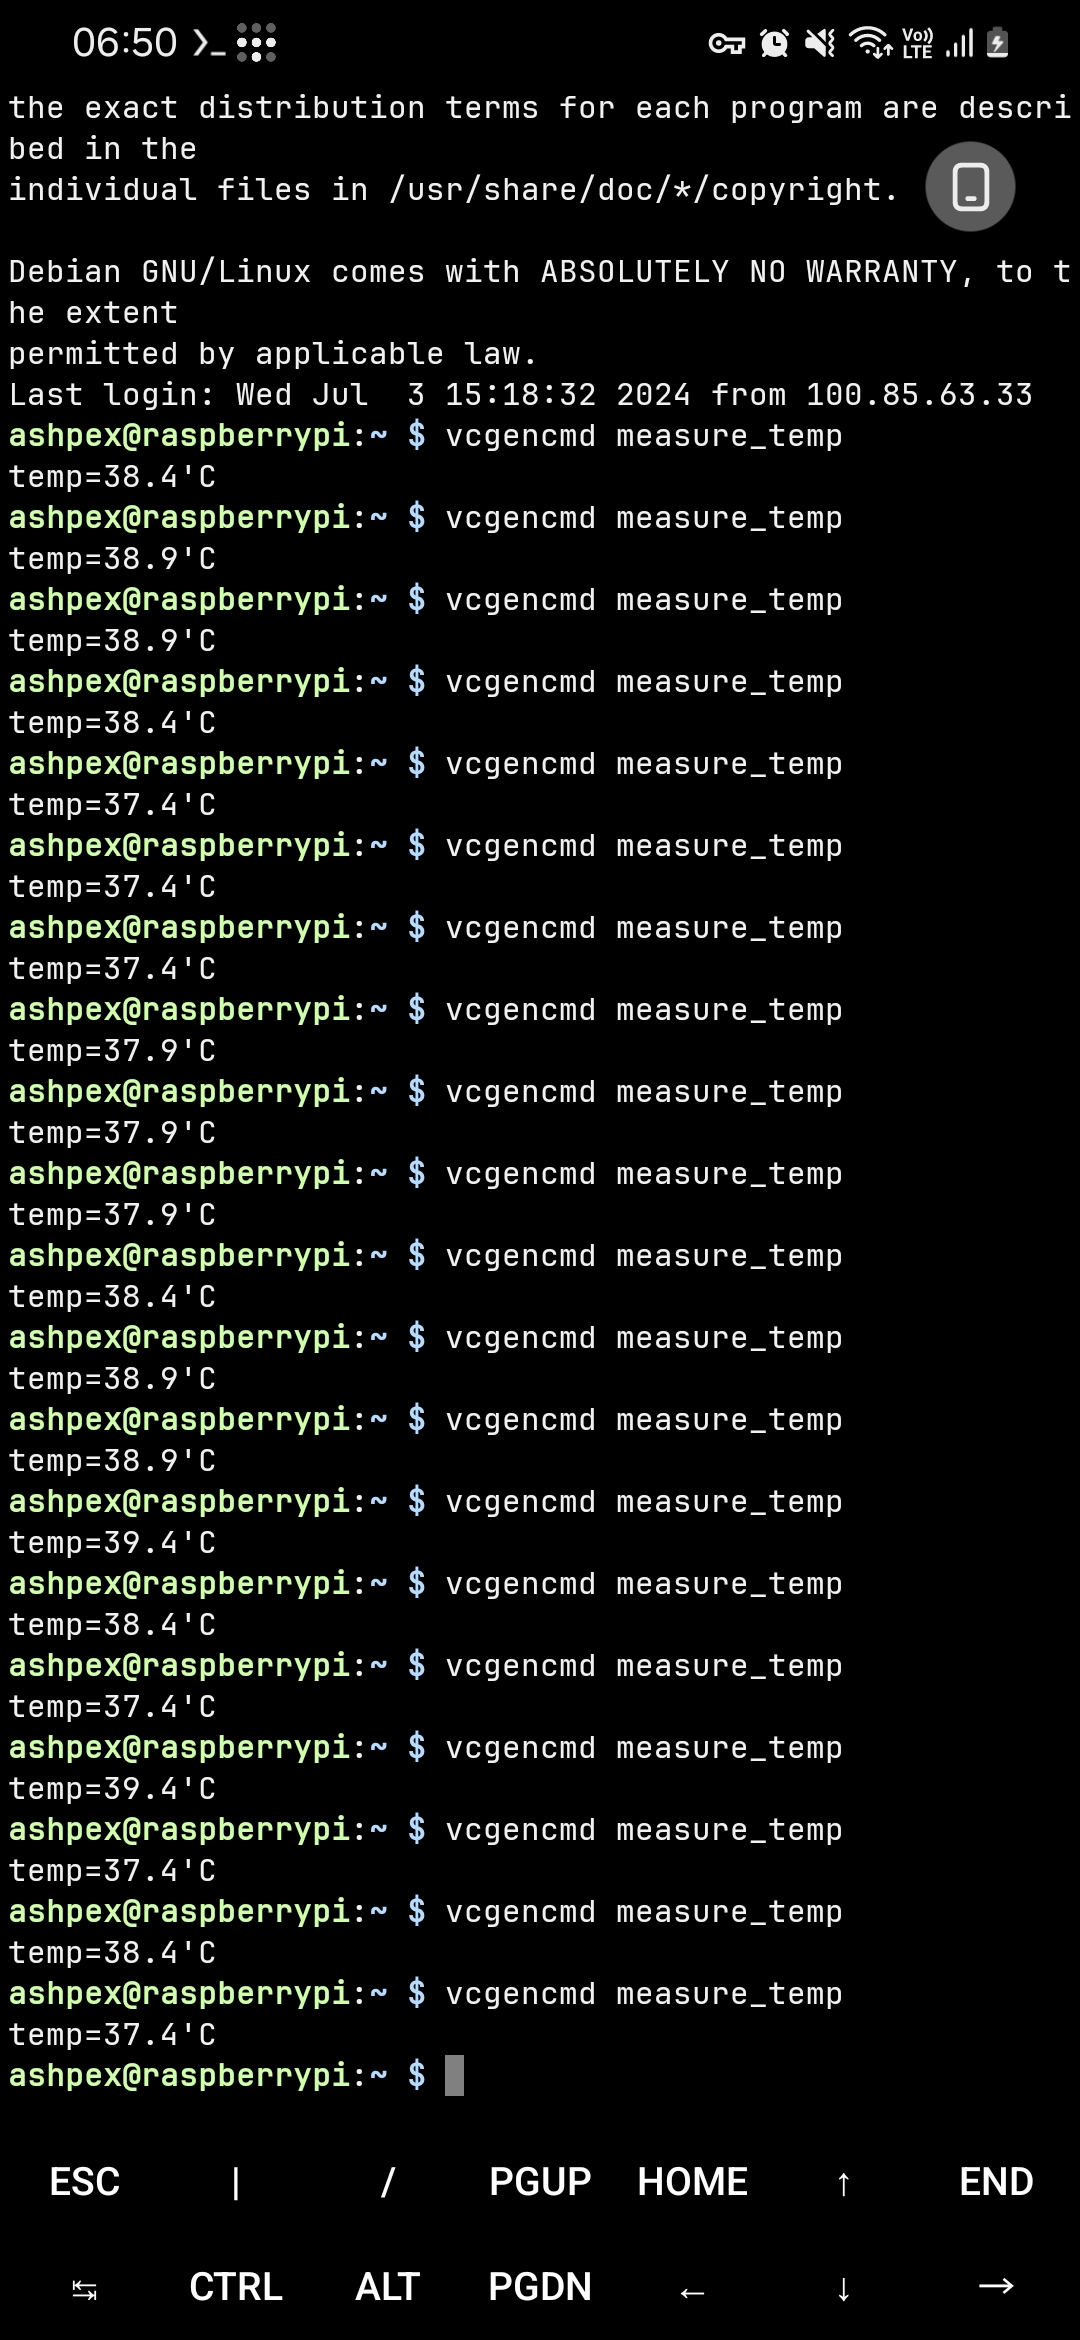
Checking my Raspberry Pi’s temperature with Termux on Android phone using SSH
Being steady under 40°C, heatsinks and fan are doing their job well. I can sleep well at night knowing my Pi is not overheating :)
5 Conclusion
I’m pretty happy with my setup so far. Really glad I took the plunge into self-hosting. It’s been a fun and rewarding experience :)
 Support Me on Ko-Fi.com